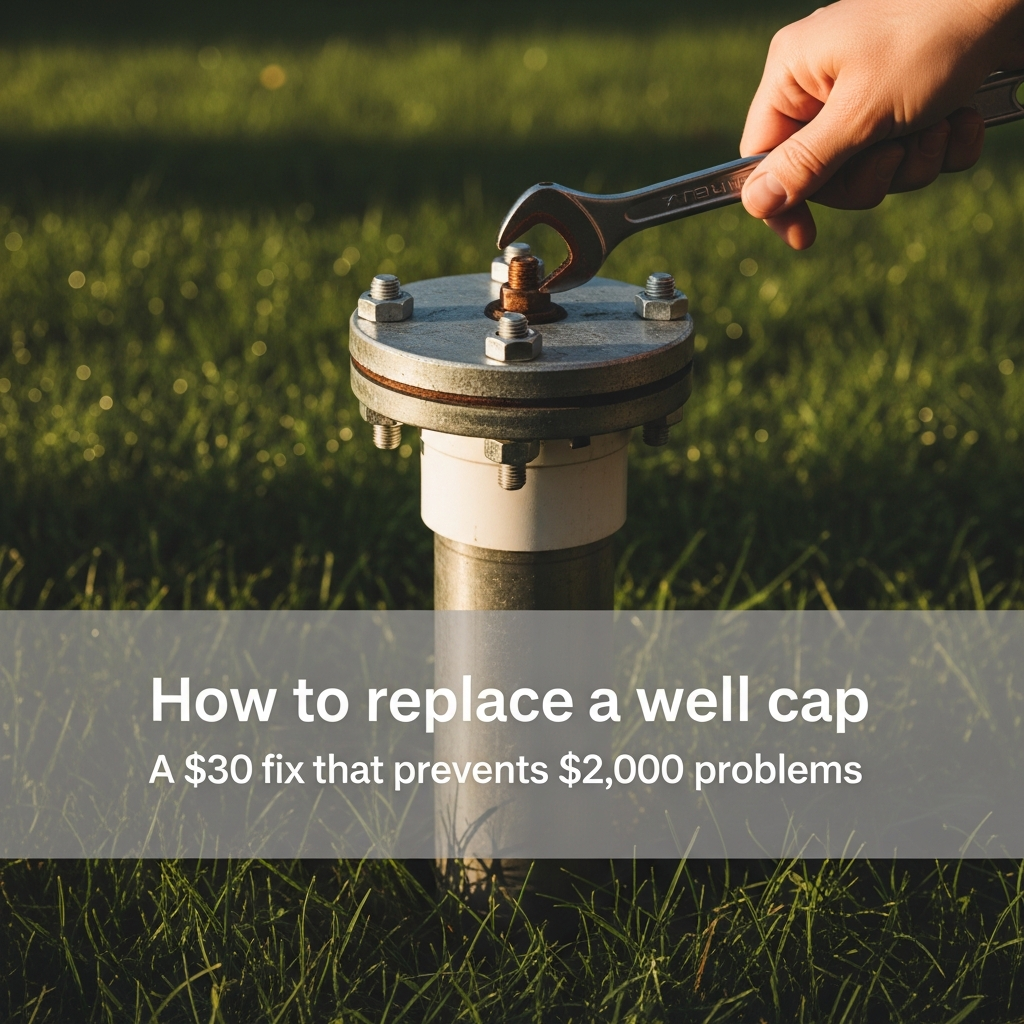
How to replace a well cap (and why a damaged cap is an emergency)
Updated February 14, 2026 — 6 min read
A damaged well cap lets insects, rodents, and surface water into your well. It’s a $15 to $40 part that you can replace yourself in 20 minutes with a wrench. If your cap is cracked, loose, or missing its gasket, replace it now — don’t wait for the next annual inspection.
I didn’t think about my well cap for the first three years on well water. It was just a metal disc on top of a pipe in the yard. Then a spring coliform test came back positive, and the well driller who came out pointed at the cap before he even looked at anything else. The rubber gasket underneath was compressed flat, one bolt was missing, and there was a mud dauber nest wedged between the cap and the casing. Surface water had been dripping into my well every time it rained.
The fix took 15 minutes and cost $28. The water test and the stress cost considerably more.
Why a bad well cap is a bigger deal than it looks
Your well cap is the only barrier between your drinking water and everything at ground level — rainwater runoff, lawn chemicals, insects, mice, and bacteria. A Penn State study found that nearly 50% of the wells they surveyed had obvious insect infestations under the cap. The same researchers found that 70% of residential wells had caps that didn’t meet sanitary standards.
That matters because of what gets in. A USGS study of private wells found coliform bacteria in roughly one-third of the wells tested, and wells with compromised caps showed significantly higher contamination rates than those with intact sanitary seals. When they installed sanitary caps on contaminated wells, 44% tested bacteria-free within a month.
The well cap is the cheapest component in your entire water system. It’s also the one most likely to be causing your contamination problem.
How to inspect your well cap
Walk out to your wellhead and look at these five things:
The cap itself. Is it cracked, rusted through, or missing pieces? Aluminum caps corrode over time, especially in acidic soil. Plastic caps become brittle and crack from UV exposure after several years. If you can see daylight through any part of the cap, replace it.
The bolts. A sanitary well cap has bolts on top that compress the cap down onto the casing. All bolts should be present and snug. If any are missing or you can spin them freely with your fingers, the seal is compromised.
The gasket. Lift the cap (turn off the power to your pump at the breaker first) and look at the rubber gasket on the underside. It should be pliable and make full contact around the circumference of the casing. If it’s cracked, compressed flat, hardened, or torn, it’s not sealing. A gasket that leaves a gap on one side is just as bad as no gasket at all.
The screened vent. Sanitary caps have a small screened vent that allows air exchange when the pump cycles. Check that the screen isn’t clogged with dirt, spider webs, or insect debris. A blocked vent can cause the pump to work harder and may create a slight vacuum inside the casing.
The casing height. Your well casing should extend at least 12 inches above the surrounding grade. That’s a standard set by the National Ground Water Association and required by code in most states. If the ground has built up around the casing over the years and the cap is now at or below grade, surface water will pool against the seal every time it rains. Either excavate around the casing or install a casing extension.
When to test after an inspection
If you find any of the problems above, replace the cap and then submit a water test for total coliform and E. coli. Don’t skip the test. A compromised cap may have been letting contaminants in for months or years. If coliform comes back positive, shock chlorinate your well and retest in two weeks.
Three types of well caps
Not all well caps are the same, and the one you have now may not be the one you should have.
Standard (contractor) caps. These are basic metal or plastic lids that sit on top of the casing, held in place by a set screw or horizontal bolts on the side. They’re cheap and easy to remove, which is the problem. The side-bolt design creates gaps that insects and water exploit. If you have one of these, upgrade to a sanitary cap when you replace it.
Sanitary (vermin-proof) caps. The current standard. These have top-facing bolts that compress a rubber gasket down onto the outside of the casing, creating an airtight seal. They include a screened vent for air exchange. Most are cast aluminum or heavy-duty thermoplastic. This is what you want on your well.
Watertight caps. Designed for flood-prone areas where the wellhead may be temporarily submerged. These seal without a vent (a separate vented pipe is installed above the expected flood line). You only need one of these if your wellhead is in a flood zone.

How to measure for a replacement
Well caps are sized by the outside diameter of your casing, not the cap you’re replacing. Common residential sizes are 4 inch, 5 inch, 6 inch, and 6.25 inch (6.25 is standard for 6-inch steel casing with a welded coupling).
To measure: wrap a flexible tape measure around the outside of your casing pipe, right below where the cap sits. That gives you the circumference. Divide by 3.14 to get the outside diameter. Or just use calipers if you have them.
Most residential drilled wells use 6-inch steel or PVC casing. If you’re not sure, measure. Buying the wrong size means the gasket won’t seal.
| Casing type | Common OD | Cap size to buy |
|---|---|---|
| 4” steel casing | 4.5” | 4” well cap |
| 5” PVC casing | 5.563” | 5” well cap |
| 6” steel casing | 6.625” | 6” well cap |
| 6” PVC casing | 6.625” | 6” well cap |
When in doubt, take the measurement to your local well supply store or plumbing supplier. They’ll match it. Hardware stores carry basic well caps, but for a proper sanitary cap you may need a plumbing supplier or an online order from Boshart, Campbell Manufacturing, or Merrill Manufacturing.
How to replace a well cap
Tools you’ll need: adjustable wrench or socket set, the new well cap, and a flashlight.
Step 1: Cut the power. Go to your breaker panel and turn off the circuit for your well pump. This is a 240V circuit. Do not skip this step.
Step 2: Remove the old cap. Loosen the bolts on top (sanitary cap) or the set screw on the side (standard cap). Lift the cap off the casing. You’ll see the electrical conduit for your pump wire passing through a hole in the cap or through a separate fitting.
Step 3: Look inside. Shine a flashlight down into the casing. Check for insect nests, debris, standing water on top of the pitless adapter, or any signs of critter activity. If you find a significant amount of debris or evidence of animal entry, plan on shock chlorinating the well after you install the new cap.
Step 4: Thread the wires and conduit through the new cap. Your pump’s electrical wires pass through the cap via a conduit fitting. Most replacement caps come with the correct fitting. Disconnect the conduit from the old cap and reconnect it through the new one. Make sure the wires aren’t pinched.
Step 5: Set the new cap and tighten. Place the cap over the casing so the gasket sits flat against the outside of the pipe. Tighten the bolts in a cross pattern — just like tightening lug nuts on a wheel. Snug is enough. You want the gasket compressed evenly, not crushed on one side. Over-tightening can crack the gasket or deform the cap.
Step 6: Restore power. Turn the breaker back on. Run a faucet in the house and confirm water flows normally. Check for any new sounds or pressure issues.
The whole job takes 15 to 20 minutes.
When to call a professional
Replace the cap yourself if all you’re doing is swapping one cap for another on an accessible casing. Call a well professional if:
- Your casing is damaged, bent, or corroded at the top and the new cap won’t seat properly
- You’re not comfortable working around the 240V pump wiring
- The well seal (different from a cap) needs replacement — seals support the pump and require pulling the drop pipe
- Your casing is below grade and needs to be extended before a new cap will work
- You found significant contamination or debris inside the casing and need a full well inspection
A service call for well cap replacement runs $150 to $300 including the part and labor. The cap itself costs $15 to $40 for a standard sanitary model.
The $30 fix that prevents the $2,000 problem
A well cap isn’t glamorous. It sits in your yard collecting grass clippings and you forget it exists. But it’s doing the same job as the front door of your house — keeping everything outside from getting inside.
If your annual maintenance checklist turns up a questionable cap, don’t add it to the “I’ll get to it” list. A new cap costs less than a water test. The coliform treatment you’ll need if you wait costs considerably more.
Your next step: go look at your well cap. If the gasket is shot, the bolts are loose, or the cap is the old side-bolt style, order a sanitary replacement and swap it out this weekend. Then run a water test to confirm your well is clean.
Related guides
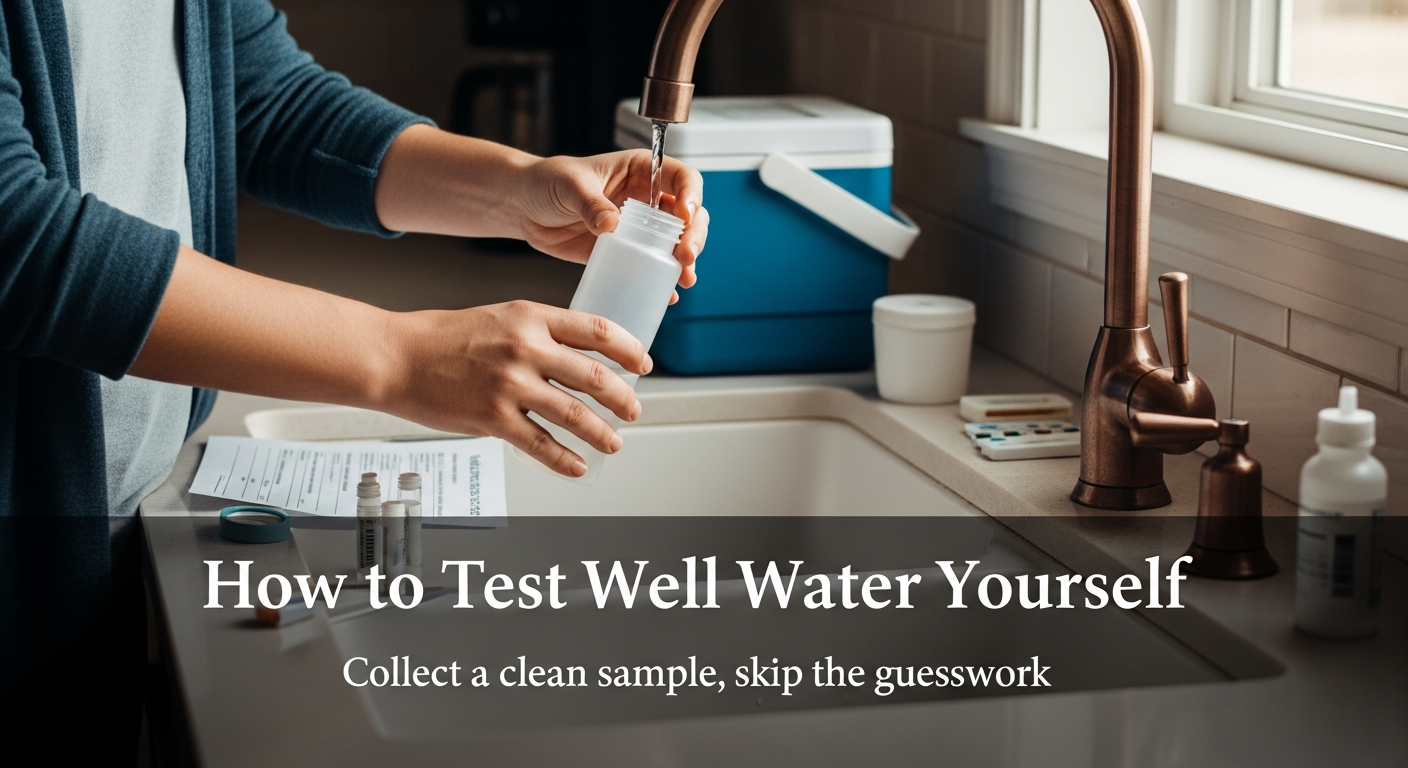
How to test well water yourself (step by step)
Use home strips for trend checks. Use your own hands to collect a clean sample for the lab when the result affects health or treatment decisions.
8 min read
How to choose the right filtration system for your well water
A water-chemistry-first guide to well water filtration by contaminant -- iron bacteria, sulfur, PFAS, manganese, and more. How to test your water, read the results, match each problem to the right filter technology, and build a treatment train that solves your specific issue.
14 min read
Septic tank additives for well owners: which ones work (and which are a waste)
What the research actually says about septic tank additives, which types are harmful, and why regular pumping beats every product on the shelf.
7 min read