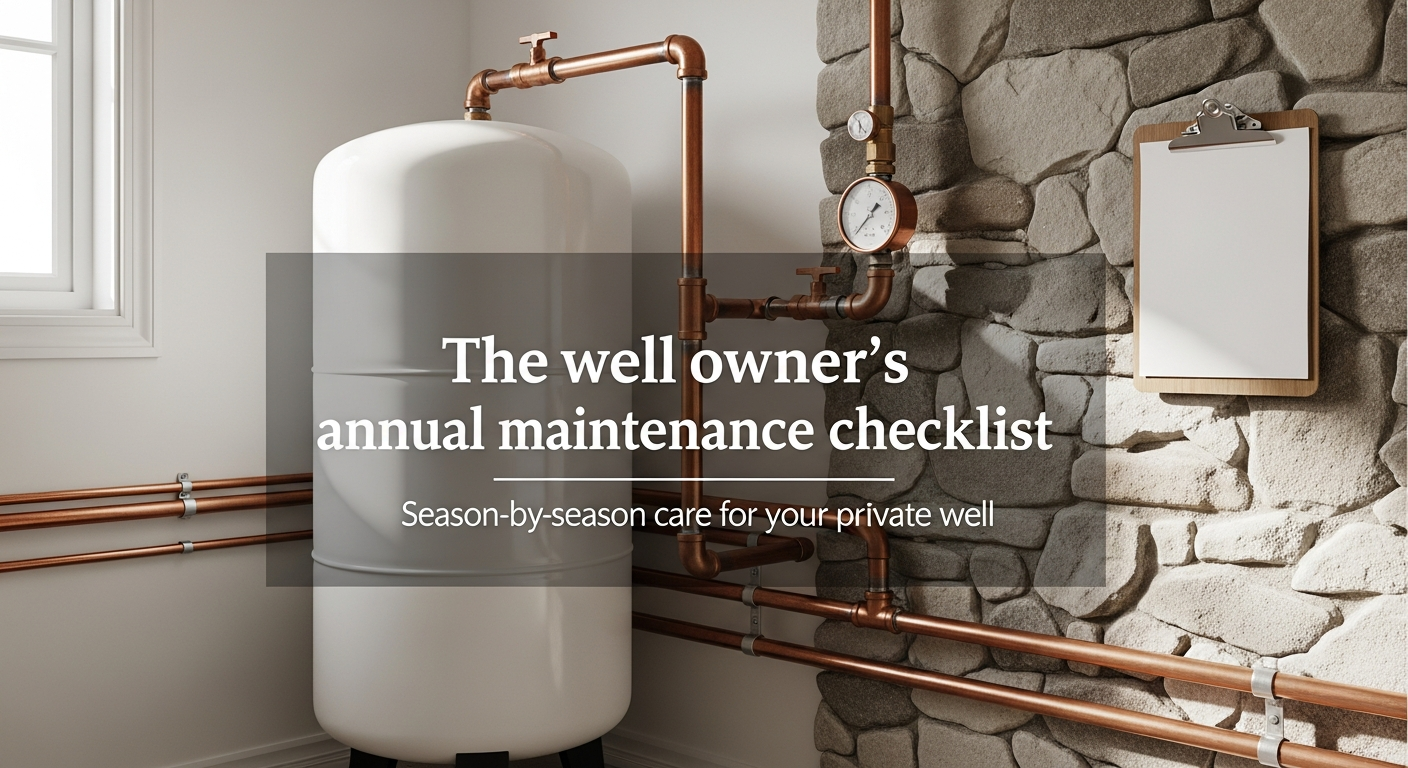
The well owner's annual maintenance checklist
Updated February 12, 2026 — 10 min read
Your well needs a water test every spring, a pressure tank check twice a year, a wellhead inspection each season, and winterization before the first freeze. A full professional inspection every 10 years rounds it out. That’s the short version. Below is the season-by-season breakdown with exact steps, costs, and the stuff nobody tells you until it’s too late.
About 43 million Americans get their water from a private well. The Safe Drinking Water Act doesn’t cover any of them. No government agency tests your water. No utility company monitors your pressure tank. If something goes wrong, you’re the one who finds out — usually on the coldest night of the year or the morning you’re hosting a house full of guests.
A USGS study of over 2,100 private wells found that one in five had at least one contaminant above the health benchmark for drinking water. Most of those homeowners had no idea, because they never tested.
This checklist is the thing I wish someone had handed me the first year I moved onto well water. It’s organized by season because well maintenance isn’t one big annual chore — it’s a handful of small tasks spread across the year that prevent expensive emergencies. Print it. Tape it to the wall in your utility room. Come back to it every few months.
The annual water test (do this first, every year)
Before you touch a single component, test your water. The EPA and CDC both recommend that private well owners test annually for four things:
- Total coliform bacteria and E. coli — the most important test. A USGS study found bacteria in roughly one-third of the private wells they tested. A positive coliform result doesn’t necessarily mean your water is making you sick right now, but it means there’s a pathway for dangerous organisms to reach your water supply.
- Nitrates — especially if you live near farmland or have a septic system. The federal drinking water standard is 10 mg/L. Above that level, nitrate is a health risk, particularly for infants under six months.
- pH — should fall between 6.5 and 8.5. Below 6.5, your water is slowly corroding your copper pipes from the inside. You won’t notice until you see blue-green stains on your fixtures or pinhole leaks start appearing.
- Total dissolved solids (TDS) — a general indicator of mineral content. The EPA secondary standard is 500 mg/L.
A standard water quality panel from a state-certified lab runs $100 to $350. That’s it. Fill a few sample bottles, drop them off or mail them in, and you know where you stand.
Every three to five years, add a comprehensive panel that includes metals (arsenic, lead, manganese, iron), hardness, and volatile organic compounds if you’re near industrial or agricultural activity. That runs $300 to $500.
Add PFAS to your testing schedule. In 2024, the EPA finalized drinking water standards for PFAS (per- and polyfluoroalkyl substances) — the “forever chemicals” that have been found in water supplies across all 50 states. The new limits are extremely low: 4 parts per trillion for PFOA and PFOS. Municipal water systems are now required to test and treat for PFAS, but private wells have no such mandate. Nobody is monitoring your well for PFAS. That’s on you.
Most state-certified labs offer PFAS testing for $200 to $350. Test at least once to establish a baseline, then retest every 2-3 years. If you live near a military base, airport, industrial facility, or fire training site — all common sources of PFAS contamination — test annually. If PFAS is detected above EPA limits, point-of-use reverse osmosis under the kitchen sink is the most effective residential treatment. The filtration guide covers PFAS removal options in detail.
Practical tip
Use a state-certified laboratory, not a free test from a water treatment company. A certified lab must use EPA-approved methods, pass independent evaluations, and maintain documented quality standards. A treatment company’s test is a sales tool with a built-in conflict of interest — they make money by finding problems. Your state health department website lists certified labs, or search the EPA’s state-by-state directory at epa.gov/privatewells.
The best time to test is late spring — after snowmelt and spring rains have pushed surface contaminants toward your water table. If you only test once a year, spring gives you the most honest picture of your well’s vulnerability.

Spring (March through May)
Spring is inspection season. The freeze-thaw cycle is hard on well infrastructure, and snowmelt can carry contaminants into wells with compromised seals.
Walk the wellhead. Go outside and look at your well casing — the pipe sticking out of the ground. It should extend at least 12 inches above grade (that’s an NGWA standard, not a suggestion). Check that the well cap is bolted tight, the rubber gasket underneath isn’t cracked or compressed flat, and the screened vent isn’t clogged with insects or debris. If you see standing water pooled around the base of the casing, you have a grading problem that needs to be fixed before the next rain.
Check surface drainage. Water should drain away from the wellhead in all directions. If the ground has settled and now slopes toward your casing, surface water is finding its way down the outside of the casing and into your water supply. This is the number one cause of coliform contamination in wells that tested clean when they were drilled.
Submit your annual water test. Collect samples and send them to your certified lab. Don’t wait until summer — spring runoff is when contamination is most likely to show up.
Inspect your pressure tank. Go to your pressure tank and check the pressure gauge. With the pump off and water drained, check the air charge at the Schrader valve (it looks like a tire valve) on top of the tank. It should read 2 PSI below your pressure switch’s cut-in setting. If your switch is set to 30/50, the tank pre-charge should be 28 PSI. If it’s low, add air with a regular tire pump. If water spews out of the Schrader valve instead of air, the bladder has failed and you need a new tank. Tank replacement runs $200 to $600 for the unit, plus labor if you’re not doing it yourself.
Check the wiring. Look at the electrical connections at your pressure switch and control box for corrosion, scorching, or insect nests. Mice and wasps love well house electrical boxes. Don’t touch anything if you’re not comfortable around 240V circuits. Just look.
Summer (June through August)
Summer is about monitoring. If you’re in a region that gets dry spells, your well’s water level drops, and you need to pay attention.
Watch for drought stress. If your pump starts running longer than usual before shutting off, or if water pressure drops during peak usage (morning showers, evening irrigation), your water table may be falling. Don’t push the pump harder. Cut back on outdoor watering first — a single sprinkler can pull 3 to 5 gallons per minute, which is more than many residential wells can sustain for hours at a time.
Listen to your pump. A healthy submersible pump runs quietly. If the pressure switch starts clicking on and off more frequently than usual — what’s called short cycling — something has changed. Usually it’s the pressure tank losing its air charge (check it again), but it can also mean the pump is struggling to keep up with demand. That rapid clicking is almost always a $20 to $50 pressure switch or a $200 to $600 pressure tank — not the $2,000+ pump replacement the emergency plumber will quote you at 11 PM on a Saturday.
Test again if anything changes. The CDC recommends testing anytime your water’s taste, odor, or appearance changes. Brown water after a heavy rain, a sulfur smell that wasn’t there last month, or a sudden metallic taste all warrant a targeted water test. Don’t just wait until next spring.
Keep the area around your wellhead clear. Mow around the casing but don’t pile mulch, soil, or compost against it. Don’t park vehicles over the wellhead. Don’t spray herbicides or pesticides within 50 feet of the well.
Fall (September through November)
Fall is preparation season. Everything you do now prevents a frozen pipe or a failed component from leaving you without water in January.
Inspect your well house or pit. If your pressure tank and plumbing are in a well house or pump house, check it before the first freeze. Look for gaps in the walls, broken windows, missing insulation, and anywhere cold air can get in. This structure doesn’t need to be heated to room temperature. It just needs to stay above freezing.
Check your heat tape. If you have heat tape on exposed pipes or at the wellhead, plug it in and verify it’s working before you need it. Self-regulating heat tape is the only type you should use on well components — it adjusts output based on ambient temperature and won’t overheat if sections overlap. Constant-wattage heat tape can be a fire risk if it crosses itself. A roll of self-regulating heat tape runs $10 to $30.
Insulate exposed pipes. Use closed-cell foam pipe insulation, not the open-cell kind. Open-cell foam absorbs water, saturates, and does nothing. Closed-cell foam sleeves cost a few dollars at any hardware store and take five minutes to install.
Drain outdoor faucets and irrigation lines connected to your well system. A frozen outdoor line can crack and backflow contaminants into your water supply when it thaws.
Warning
Never pour antifreeze into any part of your well system. Antifreeze is toxic and will contaminate your drinking water. If a component freezes, thaw it with a heat lamp, heat tape, or warm towels. Patience, not chemicals.
Winter (December through February)
Winter is protection mode. If you did the fall prep, this season is mostly monitoring.
Verify freeze protection is active. Confirm your heat tape is plugged in and your well house has no new gaps from wind damage or settling. After every major storm, walk out and check the wellhead.
Know the emergency drill. If your pipes freeze despite your prep, you need a plan. Keep 5 to 10 gallons of stored water on hand (rotate it every few months). Your water heater holds another 40 to 50 gallons you can access through the drain valve at the bottom in an emergency — just turn off the power to the heater first. If you lose water pressure, check the breaker before anything else. If the breaker is fine and the pump runs but no water comes out, you likely have a frozen section between the well and the house.
Don’t ignore short cycling in cold weather. A pressure tank that was marginal in fall may fail in winter when cold temperatures affect bladder flexibility. If the pump starts clicking on and off rapidly, check the tank air charge before assuming the pump is the problem.
Component inspection reference
| Component | Check frequency | What to look for | Typical replacement cost |
|---|---|---|---|
| Well cap and seal | Every season | Loose bolts, cracked gasket, clogged vent, insect nests | $15-$40 |
| Casing (above ground) | Spring and fall | Cracks, corrosion, standing water at base, height below 12” | $200-$800 (extension) |
| Pressure tank | Spring and fall | Air charge (Schrader valve), sediment in drain, corrosion | $200-$600 (tank only) |
| Pressure switch | Spring and fall | Pitted contacts, scorching, rapid clicking, insect debris | $20-$50 (part) |
| Wiring and control box | Spring | Corrosion, rodent damage, loose connections, scorched terminals | $150-$400 (repair) |
| Well pump | Listen year-round | Long run times, short cycling, decreased flow, noise changes | $800-$2,500 (installed) |
Aesthetic water issues to monitor
Not every well water problem is a health hazard. Some are quality-of-life issues that affect your hair, skin, laundry, and fixtures. These “aesthetic” problems won’t make you sick, but they’ll make you miserable if you ignore them. Add these to your observation checklist throughout the year.
Hard water effects on hair and skin. If your hardness is above 7 grains per gallon, you’ll notice it in the shower first. Hard water leaves a film on hair that makes it feel dry, straw-like, and difficult to manage. Color-treated hair fades faster. Blonde hair can develop a brassy or greenish tint from copper and mineral deposits. Your skin may feel tight or itchy after showering, especially in winter when humidity is already low.
The fix is a water softener, and the filtration guide covers sizing and options. If you’re seeing these symptoms, add hardness testing to your annual water test even if you haven’t before.
Laundry staining from iron and manganese. Iron above 0.3 mg/L leaves rust-orange stains on white clothes, towels, and sheets. Manganese leaves gray-black marks that are even harder to remove. If you’re pulling laundry out of the machine with mystery stains, check your water test results for iron and manganese before blaming the washing machine. These stains are permanent once heat-set in the dryer, so if you suspect iron in your water, skip the dryer until you’ve confirmed.
Fixture and appliance damage. Hard water scale builds up inside your water heater, reducing efficiency by 20-30% over its lifespan. Iron deposits clog aerators and showerheads. Manganese stains toilets and sinks with dark marks that resist standard cleaning products. These aren’t emergencies, but they cost you money in shortened appliance life, increased energy bills, and more frequent replacements.
Sulfur smell in hot water only. If you smell rotten eggs from hot taps but not cold, the problem is likely your water heater’s magnesium anode rod — not your well water. The anode rod reacts with sulfate-reducing bacteria in the tank. Replacing it with an aluminum/zinc anode ($20-$40) often eliminates the smell without any water treatment system. Check the troubleshooting guide for the diagnostic steps.
Track these issues when you notice them. If hard water, staining, or odor worsens between annual tests, run a targeted test for the specific parameter. A change in aesthetic quality often signals a change in your well’s water chemistry that your annual test will catch — if you know to look for it.
When to call a professional
Most of this checklist is stuff you can handle with a tire gauge, a flashlight, and an hour on a Saturday. But some things need a licensed well professional.
When to call a professional
Schedule a full professional inspection every 10 years. Penn State Extension recommends this as a baseline. The inspection includes flow rate testing, pump performance, water level measurement, and a check of every component from the pump to the pressure tank. Budget $250 to $550.
Call immediately after flooding. If floodwater reaches your wellhead, assume your water is contaminated until proven otherwise. Don’t drink it, don’t cook with it, don’t brush your teeth with it. Get a coliform test and be prepared to shock chlorinate once the water recedes.
Call before buying or selling a home. Most lenders require a well inspection for properties with private water supplies. Even if yours doesn’t, a $350 inspection is cheap insurance against inheriting a failing pump or contaminated well.
Call if you notice a sudden change in water pressure, color, taste, or smell that you can’t explain with something on this checklist. The $150 service call to diagnose the problem is always cheaper than the $3,000 repair you’ll need if you ignore it for six months.
Your well will run quietly for decades if you give it a few hours of attention per season. Skip the maintenance, and it’ll let you know. The checklist above is your insurance policy.
Now that you’ve got the maintenance calendar, the next step is understanding the hardware that keeps your water flowing — what each component does, how it fails, and what replacement actually costs. Start with the pump and pressure tank guide. If your annual test turns up contaminants, the filtration guide matches every common well water problem to the right treatment technology. And if something goes wrong between scheduled checks, the troubleshooting guide walks through symptoms and fixes.
Related guides
Arsenic and radon: the New England well water guide
If your private well is in New England, arsenic and radon belong on your testing list. Here's what to test, how state guidance differs, and what to do with the results.
10 min read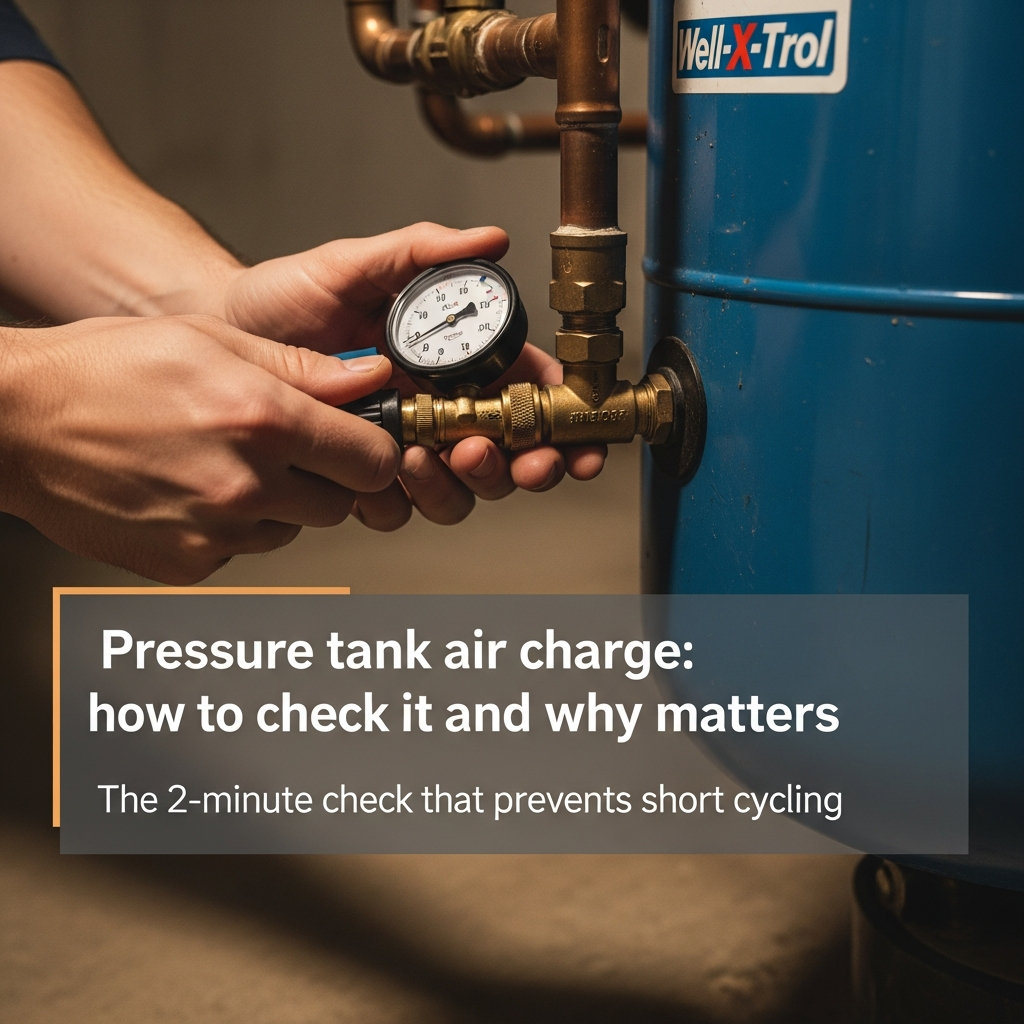
Pressure tank air charge: how to check it and why it matters
A 2-minute tire gauge check on your pressure tank's air charge can fix short cycling and pressure drops. Here's the step-by-step process.
6 min read
Best UV water purifiers for well water (bacteria defense)
The best UV purifier for well water is a Class A unit sized to your real peak flow and installed after pretreatment. Here are the systems I would actually buy.
12 min read