Well casing extension: when and why you need to extend your casing
Updated February 14, 2026 — 6 min read
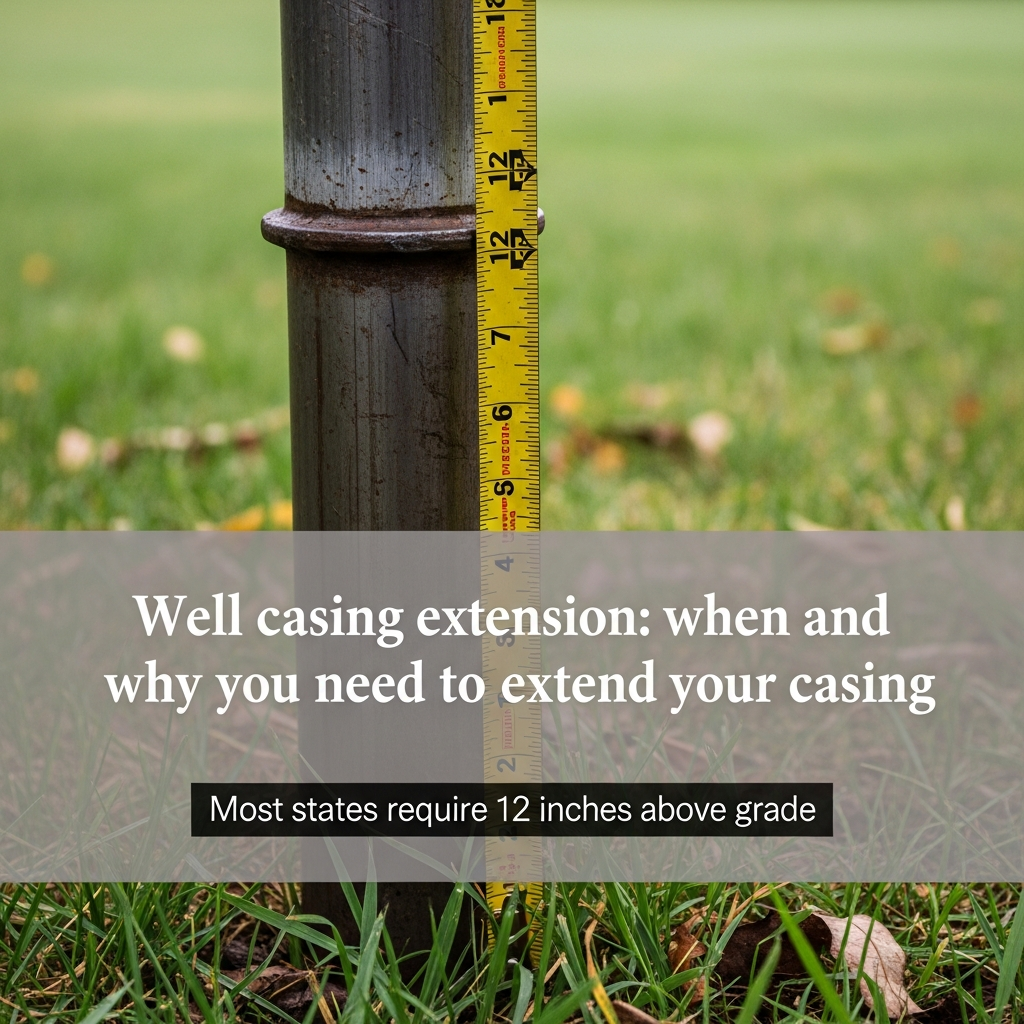
Your well casing should extend at least 12 inches above the finished ground level around it. Most state codes require exactly that. If your casing sits at grade or below it, every rainstorm, every snowmelt, and every time you water the lawn, surface water has a direct path into your drinking water. Extension costs $300 to $800 for a straightforward job, and it’s one of the cheapest fixes that eliminates one of the most common contamination risks in residential wells.
Most homeowners never think about casing height until a home inspector flags it or a water test comes back positive for coliform. By then, you’ve been drinking surface-contaminated water for who knows how long. The fix is simple, but most people don’t know it’s an issue until someone tells them.
Why casing height matters
The well casing is the pipe that lines your well from the surface down to the aquifer. Its job above ground is to keep everything that isn’t groundwater — rainwater, snowmelt, lawn chemicals, insect nests, rodent droppings — out of your drinking water supply.
When the casing terminates at or below ground level, surface water pools directly around the opening. Even with a well cap, water finds its way down the outside of the casing through the gap between the casing and the borehole wall. That’s called the annular space, and if the grout seal around your casing has deteriorated (which happens over decades), surface water migrates straight down to your water supply.
This is the single most common cause of coliform contamination in wells that tested clean when they were first drilled. Penn State Extension specifically identifies soil settlement around the wellhead — creating depressions that collect runoff — as a primary contamination pathway. The well owner’s annual maintenance checklist covers how to spot this during your seasonal wellhead inspection.
How to check your casing
Walk outside to your wellhead. Bring a tape measure. Measure from the finished ground level to the top of the casing pipe. You’re looking for at least 12 inches of clearance.
While you’re out there, check three more things:
- Is the ground sloping away from the casing in all directions? If it slopes toward the casing, surface water is pooling against it.
- Is the well cap secure and the gasket intact? A cracked cap or compressed gasket lets in insects, rodents, and water even if the casing height is fine.
- Is there standing water, mulch, or soil piled against the casing? All three create moisture contact that accelerates corrosion and contamination.
If your casing is less than 12 inches above grade — or worse, if it terminates below ground level in a well pit — you need an extension or a conversion.

What the codes actually say
Almost every state requires a minimum of 12 inches above finished grade. A few states set the bar lower, and flood-prone areas add extra requirements.
| State | Minimum above grade | Flood zone requirement |
|---|---|---|
| Pennsylvania | 12 inches | — |
| Michigan | 12 inches | — |
| Texas | 12 inches | — |
| Florida | 12 inches | — |
| Minnesota | 12 inches | — |
| Wisconsin | 12 inches | — |
| Virginia | 12 inches | 18 inches above annual flood level |
| New York | 12 inches | — |
| Ohio | 12 inches (8 inches for pre-existing wells) | — |
| Indiana | 12 inches | 24 inches above max flood level |
| Iowa | 12 inches | 12 inches above 100-year flood level |
| North Carolina | 6 inches (submersible pump on concrete slab) | — |
| Connecticut | 12 inches | — |
| New Hampshire | 8 inches | — |
If your state isn’t listed, check your state health department or department of environmental quality website. Search for “private well construction standards” plus your state name. The requirement is almost always 12 inches.
Ohio has a grandfather clause: wells built before the current rule that already have at least 8 inches don’t need to be extended to 12. But “it’s grandfathered” is not the same as “it’s safe.” Eight inches is better than flush with the ground, but it’s still not much protection during heavy rain or snowmelt.
How a casing extension is installed
The process depends on your casing material, but the most common scenario is extending a steel casing. Here’s what happens:
The well driller disconnects the pitless adapter (the fitting that connects your water line to the casing below the frost line), pulls the pump if necessary, and welds a new section of steel pipe to the top of the existing casing. The new section matches the diameter of the original casing and uses a steel collar welded to both pieces for alignment and a watertight seal. Steel must meet ASTM-A53 specifications.
For PVC casings, the extension is joined with a solvent weld or threaded coupling. Schedule 40 PVC, NSF/ANSI-certified. No tape, no adhesives, no compression fittings — those don’t hold long-term on well casings.
After the extension is welded or joined, the driller reinstalls the pitless adapter at the correct depth, installs a new sanitary well cap, reconnects the water line and electrical, and backfills any disturbed area around the casing so the grade slopes away. If your well was in a below-grade pit, the pit gets backfilled with clean sand and the casing extends above the new finished grade.
Can you do this yourself?
In most states, no. Casing extension is classified as well repair or alteration, and most states require a licensed well driller or pump installer to do the work. You also may need a permit, which typically runs $350 to $700.
There are exceptions. Pennsylvania allows homeowners to work on their own wells. Virginia specifically notes that a vertical casing extension is “not considered a well alteration” under their regulations, which may mean a licensed driller isn’t required for the extension itself (though you’d still want a professional if it involves moving the pitless adapter or pulling the pump).
Call your county health department before you start. They’ll tell you whether a permit is required and whether a homeowner exemption exists in your state. Even in states that allow homeowner work, welding steel casing requires real welding equipment and skill. A bad weld leaks, and a leaking casing joint defeats the entire purpose of the extension.
What it costs
For a straightforward steel casing extension where the driller welds on a new section, installs a new cap, and restores the grade:
- Simple extension: $300 to $800
- Extension with pitless adapter relocation: $700 to $1,500
- Full well pit elimination and conversion to above-grade: $1,000 to $2,000+
Materials alone are modest. Carbon steel casing runs $30 to $70 per foot. The labor is where the cost lives — expect $200 to $500 for the extension work itself, plus a $100 to $150 service call fee. If the driller needs to pull your pump to do the work, add another $300 to $600 for pump removal and reinstallation.
Compare that to what happens if you don’t extend it: a coliform contamination finding triggers shock chlorination ($100 to $200 if you hire someone), retesting ($100 to $350), and possibly a full well inspection ($250 to $550). If the contamination source is confirmed as surface water infiltration through a short casing, you’re paying for the extension anyway — plus everything you spent diagnosing the problem.
When casing extension becomes necessary
Eight scenarios send homeowners looking for a casing extension:
Home inspection. This is the most common trigger. A home inspector measures the casing height, notes it’s below the required 12 inches, and flags it as a deficiency. If you’re selling, the buyer’s lender may require it to be fixed before closing.
Flooding. If floodwater reached your wellhead, your water supply was compromised. After the flood, an extension (and probably shock chlorination) is the fix. The troubleshooting guide covers what to do immediately after flooding.
Landscaping changes. You added topsoil, built up a garden bed, or regraded the yard. The ground level around the casing went up. The casing didn’t.
Soil settlement. Over years, the soil around the wellhead compacts and settles, creating a depression. Water collects in the depression and runs down the outside of the casing.
Well pit conversion. Older installations sometimes placed the pressure tank and plumbing connections in a below-grade pit around the wellhead. Modern codes prohibit this because pits flood. Converting a well pit to an above-grade installation requires extending the casing above the new finished grade.
Positive coliform test. Your annual water test comes back positive for coliform bacteria, and the well driller traces the contamination source to surface water entering around a too-short casing.
Code enforcement. Your county updates its well construction standards, and your existing well no longer meets the new minimum. Ohio’s grandfather clause is the exception, not the rule.
Snow burial. In cold climates, a casing that’s only a few inches above grade disappears under snow. You can’t inspect what you can’t find, and packed snow creates moisture contact that can compromise the cap seal.
If your well is close to your septic system, a short casing is an even bigger concern. Surface runoff carrying septic leachate toward a low-profile wellhead is a contamination scenario that the well-to-septic guide covers in detail, including the setback distances your state requires.
Getting it done
Call two or three licensed well drillers in your area for quotes. Describe the current casing height, the casing material (steel or PVC), whether you have a well pit, and whether the pitless adapter needs to be moved. Get the permit situation sorted with your county health department before the driller shows up.
After the extension is installed, test your water. A standard coliform and nitrate test ($100 to $150) confirms that the contamination pathway is closed. If you haven’t tested in over a year, add a comprehensive panel while you’re at it.
Well casing integrity and surface water infiltration
A short casing is one form of well integrity failure, but it’s not the only one. Surface water can reach your drinking supply through several pathways, and understanding them helps you know what to inspect beyond casing height.
Annular space seal failure. The annular space — the gap between your casing and the drilled borehole — should be sealed with bentonite grout or neat cement from the surface down to the first confining layer. Over decades, this seal can crack, shrink, or erode. When it fails, surface water migrates down the outside of the casing like rainwater running down a downspout. You can’t see this failure from the surface. A positive coliform test after extending the casing and fixing the cap is the telltale sign that the annular seal needs attention.
Casing corrosion. Steel casings corrode from both inside and outside. Acidic water (pH below 6.5) accelerates internal corrosion. Acidic soil does the same from the outside. Pinhole perforations in the casing let groundwater from shallow, potentially contaminated zones mix with the deeper aquifer water your well is designed to tap. If your well is older than 30 years with steel casing, ask your well driller about a casing inspection during your next service call.
Regional considerations. Well integrity risks vary by geography. In New England, naturally occurring arsenic and radon in bedrock can enter wells through casing cracks that would be harmless in other regions. In Florida, shallow wells in karst limestone are especially vulnerable to surface water infiltration because the rock itself is porous. In Texas, hard water and high mineral content accelerate scale buildup inside casings, potentially masking corrosion until it’s advanced. Your regional geology determines which integrity risks matter most for your well.
If you’re buying a home with a private well, a well inspection should be non-negotiable — the casing, cap, and seal condition are as important as the water test results.
Your casing is the first line of defense between your drinking water and everything on the surface. Twelve inches of pipe above grade is all it takes.
Related guides
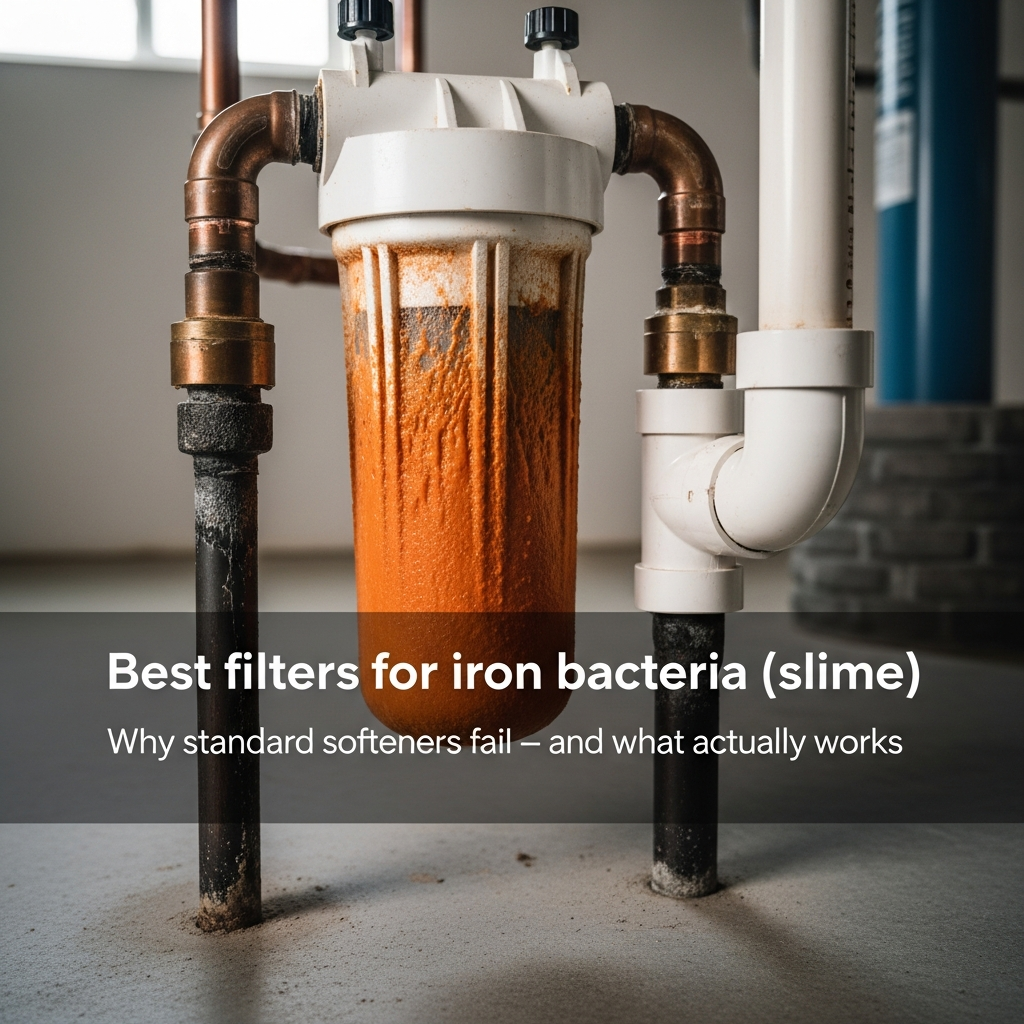
Best filters for iron bacteria (slime): why standard softeners fail
Iron bacteria coat your pipes and equipment with orange slime that standard softeners can't touch. Here are the filtration systems that actually work -- and why.
11 min read
Why well water turns blonde hair green (and how to fix it)
Copper in well water bonds to bleached and blonde hair, turning it green. Here's the science behind it, how to strip the green out, and how to stop it from coming back.
9 min read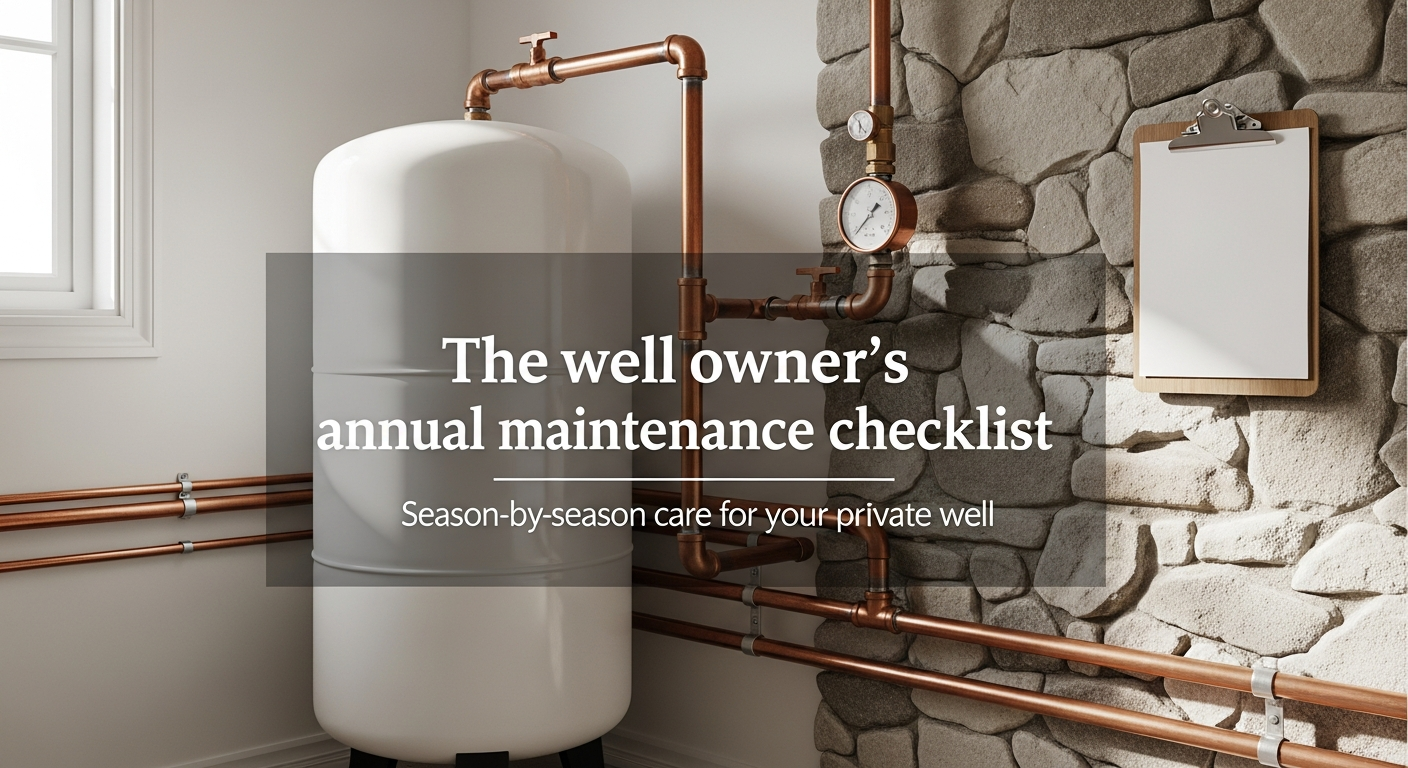
The well owner's annual maintenance checklist
A season-by-season maintenance calendar for private well owners covering water testing, component inspections, winterization, and when to call a professional.
10 min read