Understanding your well system: pumps, pressure tanks, and the hardware that keeps water flowing
Updated February 13, 2026 — 14 min read
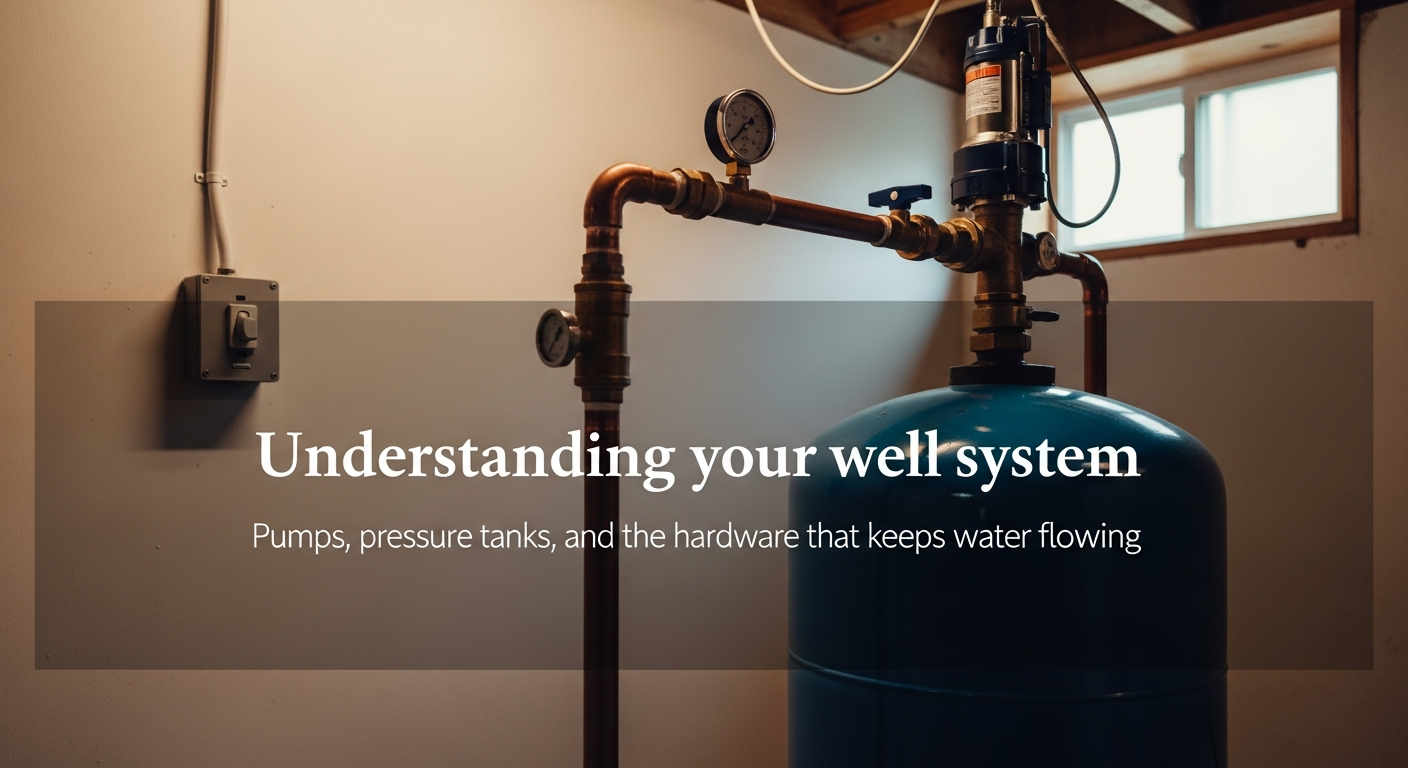
Your private well system has five major components: the pump, the pressure tank, the pressure switch, the check valve, and the pitless adapter. When everything works, you turn on a faucet and water comes out. When something fails, you need to know which part broke, what it costs to fix, and whether you can handle it yourself or need to call someone. This guide covers all of it.
Most well owners never see a diagram of their system until something goes wrong. The well driller who installed it didn’t leave a manual. The home inspector pointed at the pressure tank and said “looks fine.” And now you’re standing in the basement at 6 AM with no water, trying to figure out what that clicking sound means.
I’ve been there. This is the reference I wish someone had handed me the first year I moved onto well water — what every component does, how it fails, what replacement actually costs, and which repairs are genuinely DIY versus which ones will get you electrocuted or leave you pulling a 200-foot pipe out of a hole in your yard.
How a residential well system works
The basic flow is simple. A pump at the bottom of your well pushes water up through a pipe to your house. The water enters a pressure tank in your basement or utility room, which stores a few gallons under pressure. When you open a faucet, the pressurized tank pushes water to the fixture. When the tank pressure drops to a set point, a pressure switch turns the pump back on to refill the tank.
That’s the whole system. Five components doing one job: getting water from 100 or 200 feet underground into your kitchen faucet at consistent pressure.

The complications come from the details — what type of pump you have, how big your pressure tank is, what pressure settings your switch uses, and where the check valves sit. Each of those decisions affects reliability, efficiency, and repair costs.
The pump: submersible vs. jet
Your well has one of two pump types. Knowing which one you have is step one for any troubleshooting or replacement conversation.
Submersible pumps
A submersible pump sits inside the well casing, typically 10 to 20 feet above the bottom of the well, suspended on drop pipe and held in place by a pitless adapter at the casing wall. The motor and the pump are a single sealed unit, submerged in the water it’s pumping. The water actually cools the motor, which is one reason submersibles last a long time when they’re properly installed.
Submersible pumps dominate modern installations. If your well was drilled in the last 30 years and is deeper than 25 feet, you almost certainly have a submersible.
How to tell you have one: Look at your wellhead. If you see a well casing (a pipe sticking out of the ground) with a cap on top and no pump visible anywhere above ground, you have a submersible. The pump is down in the well, out of sight.
Lifespan: 8 to 15 years, depending on water quality, run cycles, and whether the tank is properly sized (more on that below). Sandy water is a pump killer — it acts like liquid sandpaper on the impellers.
Replacement cost: $800 to $2,500 installed, depending on well depth. The pump itself costs $300 to $800. The rest is labor, because replacing a submersible means pulling the entire drop pipe assembly out of the well — every section, one at a time. On a 200-foot well, that’s a full day’s work for a two-person crew with a hoist.
Jet pumps
A jet pump sits above ground — usually in your basement, crawl space, or a well house. It uses suction and a venturi nozzle to pull water up from the well. Shallow well jet pumps work for wells under 25 feet. Deep well jet pumps can reach down to about 100 feet by using a two-pipe system with a jet body mounted inside the well.
Jet pumps are older technology. You’ll find them on older properties, shallow hand-dug wells, and some well points. They’re louder than submersibles, less efficient, and more prone to losing prime (the column of water in the suction pipe that the pump needs to create suction).
How to tell you have one: There’s a pump motor visible above ground, either in your basement or in a pump house near the well. You can hear it running. If there’s a tank bolted to the side of the motor, that’s a shallow well jet pump.
Lifespan: 10 to 20 years for the motor and pump body. Jet assemblies down in the well can last longer.
Replacement cost: $400 to $1,200 installed. Cheaper than submersibles because there’s no pulling pipe out of a well.
Which is better?
Submersible, in almost every case. They’re quieter, more efficient, better suited for deep wells, and don’t lose prime. If you’re replacing a jet pump on a well deeper than 25 feet, most well professionals will recommend converting to a submersible system. The upfront cost is higher, but the reliability and efficiency difference is worth it.
The one scenario where a jet pump still makes sense: a very shallow well (under 25 feet) where you want the pump accessible above ground for easy maintenance. Even then, a submersible is usually the better choice.
The pressure tank
The pressure tank is the component you can see and touch — the big steel or fiberglass tank in your basement or utility room, usually blue or gray. Its job is to store water under pressure so that the pump doesn’t have to run every time you open a faucet.
How it works
Inside a modern pressure tank is a rubber bladder or diaphragm. On one side of the bladder is water from the well. On the other side is a pocket of compressed air. When the pump fills the tank, the water compresses the air pocket. When you open a faucet, the compressed air pushes the water out.
This design does two critical things. First, it provides consistent water pressure throughout your house without the pump running continuously. Second, it gives the pump motor rest time between cycles. A pump motor that runs continuously overheats. A pump that cycles on and off every few seconds (short cycling) burns out the motor starter. The pressure tank creates a buffer that lets the pump run for a few minutes, fill the tank, then rest until the pressure drops again.
Bladder tanks vs. diaphragm tanks
Both types use a rubber membrane to separate air from water. The difference is the shape.
- Bladder tanks have a balloon-shaped rubber bladder suspended inside the tank. The air charge surrounds the bladder. Most residential tanks are bladder type. Brands: Amtrol Well-X-Trol, Flexcon Industries.
- Diaphragm tanks have a flat rubber sheet across the middle of the tank, dividing it into an air half and a water half. Less common in residential wells, more common in boiler expansion tanks.
For residential well systems, bladder tanks are the standard. Unless your well professional specifies otherwise, that’s what you’ll buy.
The air pre-charge (and why it matters)
Every pressure tank has a Schrader valve on top — it looks exactly like a tire valve. Behind that valve is the air charge that makes the whole system work.
The air pre-charge should be set to 2 PSI below your pressure switch’s cut-in setting. If your pressure switch is set to 30/50 (kicks the pump on at 30 PSI, off at 50 PSI), your tank pre-charge should be 28 PSI. If it’s set to 40/60, the pre-charge should be 38 PSI.
If the air charge is too low, the tank becomes “waterlogged” — it fills completely with water, leaving no air cushion. The result is short cycling: the pump kicks on and off every few seconds because there’s no buffer. Short cycling is the single most common cause of premature pump motor failure.
Checking the air charge takes two minutes with a tire gauge. Turn off the pump, drain the tank (open a faucet until water stops), then press the gauge against the Schrader valve. If it’s low, add air with a bicycle pump or small compressor. If water sprays out of the Schrader valve instead of air, the bladder has failed and you need a new tank.
Practical tip
Check your pressure tank air charge twice a year — spring and fall. Write the correct pre-charge value on a piece of tape and stick it on the tank so you don’t have to remember the number. This 2-minute check prevents the most common cause of pump motor failure.
Tank sizing
An undersized pressure tank causes short cycling. An oversized tank wastes money but doesn’t hurt anything. When in doubt, go bigger.
The number on the tank label (20 gallon, 32 gallon, 44 gallon) is the total volume, not the usable water storage. The actual “drawdown” — the amount of water the tank delivers between pump-on and pump-off — is much smaller. A 20-gallon tank typically provides about 5 to 6 gallons of drawdown. A 32-gallon tank provides about 8 to 10 gallons.
For most residential wells with a pump flow rate of 5 to 10 gallons per minute (GPM), a 20-gallon tank is the bare minimum. A 32-gallon or larger tank gives the pump more rest time and is worth the $100 to $200 price difference.
Replacement cost: $200 to $600 for the tank, depending on size. Installation adds $100 to $300 in labor if you’re not doing it yourself. A tank swap is a realistic DIY project — it’s plumbing, not electrical, and the connections are standard threaded fittings.
The pressure switch
The pressure switch is a small gray or black box mounted on a pipe tee near the pressure tank, with electrical wires running to it from your well pump circuit. Its job is simple: turn the pump on when pressure drops to a set point, turn it off when pressure reaches a higher set point.
The two standard settings
- 30/50: Pump turns on at 30 PSI, off at 50 PSI. This is the most common residential setting.
- 40/60: Pump turns on at 40 PSI, off at 60 PSI. Provides higher pressure throughout the house, which matters if you have a large home, multiple stories, or long pipe runs.
The 20-PSI gap between cut-in and cut-out is called the “differential.” Some switches let you adjust the differential separately from the base pressure.
How it works
Inside the switch, a spring-loaded mechanism responds to water pressure. When pressure drops to the cut-in point, a set of electrical contacts close, completing the 240V circuit to the pump motor. When pressure rises to the cut-out point, the contacts open and the pump stops. That’s it — a purely mechanical device controlling an electrical circuit.
Common failures
Pressure switches are cheap parts ($20 to $50) that fail in predictable ways:
- Pitted or burned contacts: The electrical contacts inside the switch arc every time they open and close under load. Over years, this pitting degrades the contact surface until the switch can’t reliably complete the circuit. The pump may hesitate to start, or the switch may chatter (rapid clicking).
- Stuck contacts: Corrosion or debris can prevent the contacts from opening. The pump runs continuously and won’t shut off, which will eventually trip the breaker or burn out the motor.
- Failed spring: The spring that sets the pressure points weakens over time. The switch turns the pump on too early or too late.
If your pressure switch is clicking on and off rapidly, don’t panic. It’s almost always a waterlogged pressure tank or a failing pressure switch — not a dead pump. Check the tank air charge first. If that’s fine, replace the switch. It’s a $30 part and a 20-minute job if you’re comfortable turning off a 240V breaker and reconnecting three wires.
Warning
The pressure switch is wired to a 240V circuit. Before you open the cover or touch the wiring, turn off the circuit breaker for the well pump and verify with a voltage tester that the wires are dead. 240V is enough to kill you. If you’re not comfortable working around electrical circuits, call an electrician or well technician. A $150 service call is cheaper than a trip to the emergency room.
Check valves
A check valve is a one-way valve that lets water flow up from the well but prevents it from flowing back down when the pump turns off. Without a check valve, the water column in the drop pipe drains back into the well every time the pump cycles off, and the pump has to refill that entire column before water reaches your house.
Most submersible installations have a check valve built into the pump itself and at least one more in the drop pipe, usually near the pitless adapter. Some installations have a third check valve at the pressure tank.
When they fail
A failed check valve lets water drain back into the well. Symptoms include:
- Loss of prime (jet pump systems): the pump runs but produces no water
- Air bursts and sputtering at the faucet when the pump first kicks on
- Short cycling: the pump fills the tank, shuts off, and the tank pressure immediately drops as water drains back through the bad check valve
Check valves are $15 to $40 parts. The catch is that the ones inside the well require pulling the pump and drop pipe to access — the same labor-intensive process as a pump replacement. The check valve at the pressure tank, if you have one, is accessible and replaceable as a DIY project.
The pitless adapter
The pitless adapter is a two-piece fitting installed through the well casing wall, usually 4 to 6 feet below grade (below the frost line). The drop pipe from the pump connects to the bottom half. The horizontal water line running to your house connects to the top half. When the two halves are engaged, water flows from the pump, through the casing wall, and into your house.
You’ll never see the pitless adapter in normal operation. It’s underground, inside the well casing. But you should know it exists, because it’s the connection point that allows the pump and drop pipe to be pulled out for service without excavating the water line.
Lifespan: 20 to 30+ years. Pitless adapters rarely fail unless they’re corroded or were improperly installed.
Replacement cost: $100 to $300 for the part, but installation requires pulling the pump — so it’s typically done at the same time as a pump replacement.
Wiring and the control box
Submersible pumps run on 240V power. The wiring runs from your breaker panel to a control box (for three-wire motors) or directly to the pressure switch (for two-wire motors), then down through the well casing to the pump.
Two-wire vs. three-wire: Pumps under 1 HP typically use a two-wire configuration with the starting components built into the motor. Pumps 1 HP and above use a three-wire configuration with a separate control box mounted on the wall near the pressure tank. The control box contains a starting capacitor and relay.
The control box is a common failure point. Starting capacitors wear out, relays stick, and contacts corrode. A failed control box mimics a dead pump — no water, no motor hum, nothing. Before assuming your pump is dead, check the control box. A replacement capacitor is $15 to $30. A new control box is $80 to $200. A new pump is $800 to $2,500. The diagnosis matters.
Component lifespan and cost reference
| Component | Typical lifespan | Replacement cost (part) | Replacement cost (installed) | DIY feasible? |
|---|---|---|---|---|
| Submersible pump | 8-15 years | $300-$800 | $800-$2,500 | No — requires pulling pipe |
| Jet pump | 10-20 years | $200-$500 | $400-$1,200 | Yes, if accessible above ground |
| Pressure tank | 10-15 years | $200-$600 | $300-$900 | Yes — plumbing only |
| Pressure switch | 5-10 years | $20-$50 | $75-$200 | Yes, with electrical caution |
| Check valve (at tank) | 10-20 years | $15-$40 | $50-$150 | Yes — plumbing only |
| Check valve (in well) | 10-20 years | $15-$40 | $500-$1,500 | No — requires pulling pipe |
| Control box | 10-15 years | $80-$200 | $150-$350 | Yes, if you’re comfortable with 240V |
| Pitless adapter | 20-30+ years | $100-$300 | Done during pump pull | No — requires pulling pipe |
What you can fix yourself (and what you shouldn’t)
DIY-friendly:
- Checking and adjusting the pressure tank air charge (tire gauge, bicycle pump)
- Replacing a pressure switch ($30 part, 20 minutes, requires shutting off the 240V breaker)
- Replacing a pressure tank (plumbing connections, no electrical work)
- Replacing a check valve at the pressure tank
- Replacing a control box capacitor or the whole box (if comfortable with 240V wiring)
Call a professional:
- Anything that requires pulling the pump and drop pipe out of the well. This needs a hoist, specialized tools, and usually two people. A dropped pump means a recovery job that costs more than the replacement.
- Well casing repair or modification
- Any work below grade on the pitless adapter
- Electrical troubleshooting if you’re not confident with 240V circuits
A professional well service call runs $150 to $300 for the diagnosis. Pump replacement labor adds $500 to $1,500 depending on well depth. Know what you’re paying for: the part, the labor to pull and reinstall the pipe, and the trip charge. Get a written estimate before they start.
When to call a professional
If your pump is more than 12 years old and you’re replacing a pressure switch or control box, ask the well tech to check the pump’s amp draw while they’re there. An amp draw above the motor nameplate rating means the pump is struggling. Catching this early lets you plan and budget for a pump replacement instead of dealing with it as an emergency on a holiday weekend.
The big picture
Your well system is reliable hardware that runs quietly for years — as long as the pressure tank has the right air charge and the pump isn’t short cycling. The two cheapest things you can do to protect the most expensive component (the pump) are checking the tank pressure twice a year and listening for short cycling.
If something does fail, start with the cheapest and most accessible component. Pressure switch before control box. Control box before pump. Check the $30 part before you assume you need the $2,500 job.
For the seasonal inspection checklist that tells you when to check each component, see the well owner’s annual maintenance checklist. And if you’re dealing with the relationship between your well and your septic system — setback distances, softener discharge, contamination risks — the well-to-septic guide covers that.
Related guides
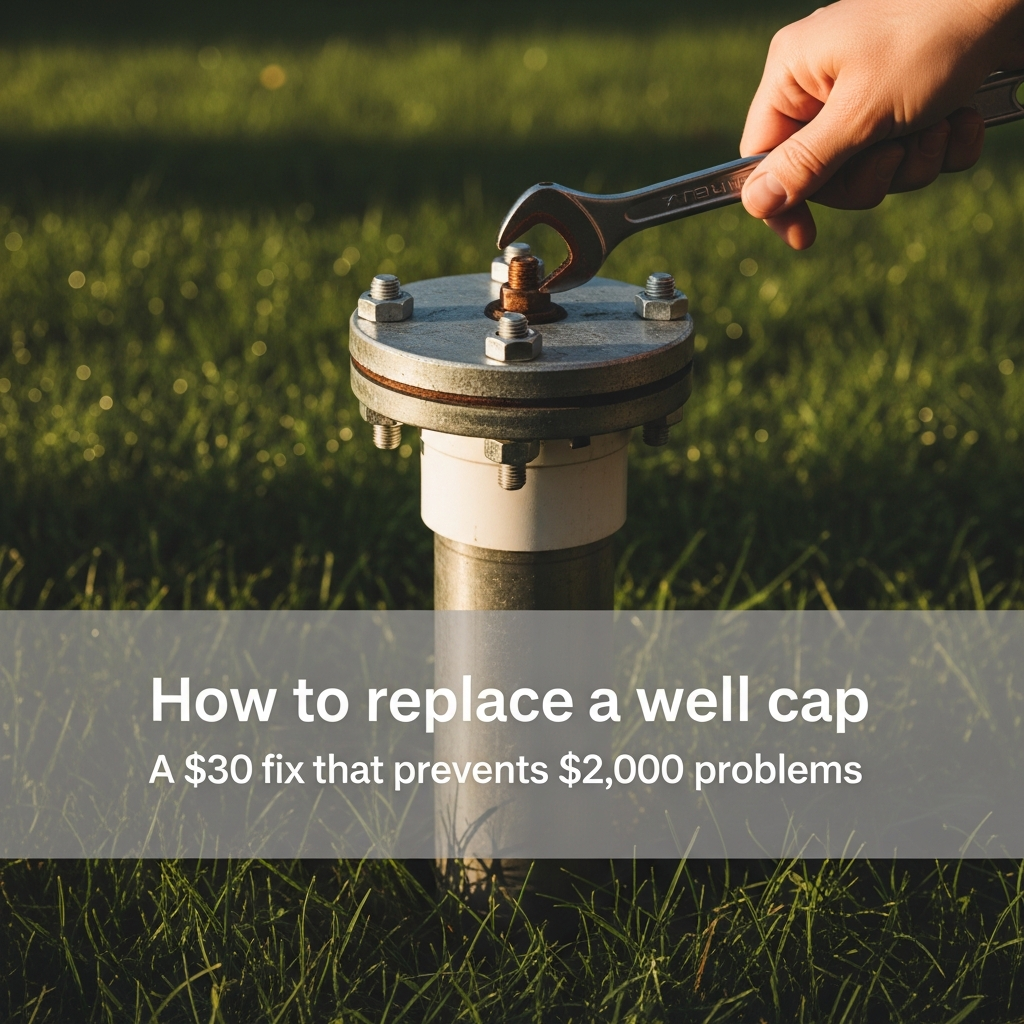
How to replace a well cap (and why a damaged cap is an emergency)
A cracked or loose well cap is the most common pathway for bacteria, insects, and surface water to enter your well. Here's how to inspect yours, measure for a replacement, and install it yourself.
6 min read
Buying a house with a private well: the inspection checklist
What to inspect, test, and negotiate before closing on a home with a private well. Flow rates, water quality, pump age, septic distances, and the contingency clause that protects you.
12 min read
Well casing extension: when and why you need to extend your casing
How to tell if your well casing is too short, what state codes require, what extension costs, and whether you can do it yourself or need a licensed driller.
6 min read