
How to choose the right filtration system for your well water
Updated February 14, 2026 — 14 min read
Start with a water test, not a product. Every well is different, and the right filtration system depends entirely on what’s in your water — not what’s on sale, not what your neighbor installed, and not what the door-to-door salesman recommended after a 10-minute “free water test” in your kitchen.
That’s the core principle of this guide. I’ll walk you through testing your water, reading the results, understanding which treatment technology addresses each contaminant, and building a multi-stage system that matches your actual water chemistry. The goal is to get you to the point where you can have an informed conversation with a water treatment professional — or confidently spec a system yourself.
If you’re dealing with a specific symptom right now — no water, brown water, sulfur smell, low pressure — the troubleshooting guide is a faster starting point. This guide is for the homeowner who wants to solve their water quality problem systematically, not reactively.
Why you need a water test before you buy anything
I made this mistake my first year on well water. I noticed iron staining in the toilets, went online, and bought a $900 iron filter. The staining didn’t stop. Turned out I had tannins and iron, and the tannin component — which looks like weak tea mixed with the iron’s orange — needed a completely different treatment system. The iron filter I bought did nothing for tannins. Nine hundred dollars and a weekend of installation, wasted.
A water test would have cost me $150 and told me exactly what I was dealing with before I spent a dime on equipment.
What to test for. At minimum, test for these parameters:
| Parameter | Why it matters | EPA standard |
|---|---|---|
| Iron | Staining, taste, clogs pipes and appliances | 0.3 mg/L (secondary) |
| Manganese | Black staining, health concern at high levels | 0.05 mg/L (secondary), 0.3 mg/L (health advisory) |
| pH | Corrosion risk below 6.5, scaling above 8.5 | 6.5-8.5 (secondary) |
| Hardness | Scale buildup, soap interference | No federal standard; >7 gpg considered hard |
| Total dissolved solids (TDS) | General mineral content indicator | 500 mg/L (secondary) |
| Coliform bacteria / E. coli | Contamination pathway present | Zero (primary — any detection is a failure) |
| Nitrates | Health risk, especially for infants | 10 mg/L (primary) |
| Hydrogen sulfide | Rotten egg smell | No standard, but noticeable at 0.01 mg/L |
| Tannins | Tea-brown color, interferes with other treatments | No standard |
The “primary” standards are health-based — exceeding them means the water poses a real risk. “Secondary” standards are cosmetic — iron-stained laundry is annoying, not dangerous. But secondary contaminants can still damage your plumbing, ruin appliances, and make the water unpleasant enough that you stop drinking it, which is its own problem.
Where to get tested. Three good options:
- State-certified lab. Your state health department maintains a list of certified labs. Costs $100 to $350 for a comprehensive panel. This is the gold standard.
- Tap Score (SimpleLab). Mail-in test kits with lab analysis. Their “Well Water” package covers the essentials. Costs $150 to $250. Results come with plain-English interpretations.
- County extension office. Some university extension programs offer water testing at reduced cost. Call your county’s Cooperative Extension office.
Don’t rely on the free test kits from water treatment companies. Those tests typically check for hardness and maybe iron — just enough to sell you a softener. They won’t test for pH, manganese, tannins, bacteria, or nitrates, and those are the parameters that determine whether you need a $500 system or a $3,000 one.
Practical tip
Test your water in spring, after snowmelt or heavy rains. That’s when surface water infiltration is most likely, which means bacterial contamination, elevated nitrates, and turbidity will show up if they’re going to. A test done during dry summer conditions can miss seasonal problems. The annual maintenance checklist includes a full testing schedule.
How to read your water test results
Your lab report will come back with a list of parameters, measured values, and reference ranges. Here’s how to make sense of it.
Primary contaminants (health risks). If any of these exceed the EPA Maximum Contaminant Level (MCL), the water is unsafe to drink as-is:
- Coliform bacteria: Any detection means a contamination pathway exists. A positive result doesn’t always mean you’re sick, but it means something — surface water, a cracked well cap, animal activity near the wellhead — is letting bacteria reach your water. Shock chlorinate the well first, then retest. If it comes back positive again, the contamination source needs to be found and fixed. UV disinfection provides ongoing protection after the source is addressed.
- Nitrates above 10 mg/L: A health risk, especially for infants. Common near agricultural areas and properties with septic systems. If your well is close to your septic system, nitrate testing is non-negotiable.
- Arsenic, lead, or other heavy metals: If present above MCLs, point-of-use reverse osmosis is typically the treatment. Whole-house treatment for these is more complex and expensive.
Secondary contaminants (aesthetic/nuisance). These won’t make you sick at typical residential levels, but they damage plumbing, stain fixtures, and make the water unpleasant:
- Iron above 0.3 mg/L: Orange-brown staining on fixtures, laundry, and toilets. The higher the level, the more aggressive the treatment needed.
- Manganese above 0.05 mg/L: Black staining that’s harder to remove than iron. Above 0.3 mg/L, the EPA has a health advisory — especially for infants and young children.
- Hardness above 7 gpg (grains per gallon): Scale buildup in pipes, water heater, and appliances. Soap doesn’t lather well. Hard water shortens water heater life by years.
- pH below 6.5: Acidic water corrodes copper pipes, causing blue-green stains and eventually pinhole leaks. Fix pH before installing other treatment systems — low pH makes everything downstream work less effectively.
- Hydrogen sulfide (any detection): The rotten egg smell. Even trace amounts are noticeable because the human nose can detect H2S at extremely low concentrations.
The key insight: many well water problems are interconnected. Low pH makes iron and manganese harder to remove. High iron interferes with UV disinfection. Tannins and iron look similar but need completely different systems. Your water test report tells you what’s actually happening so you can solve the root cause, not just the symptom.
The treatment technologies
Each contaminant has a specific treatment technology (or set of technologies) that addresses it. Choosing the wrong technology for your contaminant is the most expensive mistake a well owner can make. Here’s what works, and when.
Sediment filtration
What it removes: Sand, silt, clay, rust particles, and other suspended solids.
How it works: Physical barrier that catches particles above a certain size. Available in cartridge filters (pleated, wound, or melt-blown), spin-down filters (reusable screen), and bag filters.
When you need it: If your water is visibly cloudy, leaves grit in the bottom of a glass, or clogs faucet aerators regularly. Sediment filtration is also required as pre-treatment before UV systems, softeners, and many other treatment technologies — sediment fouls those systems if it’s not caught first.
Micron ratings. A 20-micron filter catches sand and large particles. A 5-micron filter catches finer sediment. A 1-micron filter catches almost everything visible. The tradeoff: finer filtration means more frequent filter changes and slightly more pressure drop. For most well applications, a 5-micron cartridge filter handles it. If you have heavy sediment (sand producers, shallow wells), a spin-down filter as a first stage followed by a cartridge filter is a solid setup.
Annual cost: $30 to $100 for replacement cartridges (changed every 1-3 months depending on sediment load). Spin-down filters cost $0 in consumables — you just rinse the screen.
Oxidation and filtration (iron, manganese, hydrogen sulfide)
What it removes: Dissolved iron, manganese, and hydrogen sulfide gas.
How it works: Dissolved iron and manganese are invisible in water. You can’t filter what you can’t see. Oxidation converts them from a dissolved state into solid particles that a filter media can then trap. The oxidation step is what makes these systems work.
Three common approaches:
Air injection (AIO) systems. An air pocket at the top of the tank oxidizes the dissolved metals as water passes through. The oxidized particles are caught by the filter media below. These systems backwash periodically to flush the trapped solids. No chemicals needed. Best for iron up to 10-15 mg/L with pH above 7.0.
Greensand (manganese dioxide) filters. The media itself acts as both oxidizer and filter. Requires periodic regeneration with potassium permanganate (a purple chemical that stains everything it touches). Effective for iron and manganese but more maintenance-intensive than air injection. Handles lower pH water better than AIO.
Catalytic carbon or Birm filters. Birm is a lightweight media that works for iron removal at pH above 6.8. Catalytic carbon (like Centaur) handles both iron and hydrogen sulfide. Neither requires chemical regeneration, but they’re pH-sensitive — below 6.8 for Birm or below 6.0 for catalytic carbon, they stop working.
The pH dependency. This is where most DIY installations go wrong. Every iron/manganese filter media has a minimum pH requirement. If your water’s pH is 6.2, a Birm filter will do nothing. An air injection system will struggle. You need to raise the pH first (with an acid neutralizer), then treat the iron. The treatment train order matters.
Annual cost: $0 to $50 for air injection systems (just electricity for the backwash valve). $100 to $200 for greensand systems (potassium permanganate). Media replacement every 5-10 years costs $200 to $500.
Water softening (ion exchange)
What it removes: Calcium and magnesium (hardness), plus some dissolved iron (typically up to 3-5 mg/L).
How it works: Resin beads in the tank exchange sodium ions for calcium and magnesium ions. When the resin is saturated, the system regenerates by flushing with salt (sodium chloride) brine, which recharges the resin and sends the captured minerals down the drain.
When you need it: If your hardness is above 7 gpg and you’re seeing scale buildup in your water heater, white crusty deposits on faucets, soap that won’t lather, or stiff laundry. A water heater running on hard water at 15+ gpg loses 20-30% of its efficiency over its lifespan from scale accumulation.
Sizing matters. A softener is sized by grain capacity, which depends on your hardness level and daily water usage. A family of four using water at 15 gpg hardness needs roughly a 40,000-grain system. Undersized systems regenerate too frequently, wasting salt and water. Oversized systems sit stagnant between regenerations, which can promote bacterial growth in the resin bed.
Demand-initiated vs. timer-based. Demand-initiated regeneration softeners (the good kind) only regenerate when the resin is actually exhausted. Timer-based softeners regenerate on a fixed schedule whether they need to or not. If your home is on a septic system, demand-initiated is important — each regeneration dumps 35 to 80 gallons of brine water, and your septic tank doesn’t need unnecessary hydraulic load.
The salt-free alternative. Template Assisted Crystallization (TAC) systems don’t remove hardness minerals — they convert them into a crystalline form that doesn’t stick to pipes and surfaces. TAC systems don’t require salt, don’t produce wastewater, and don’t add sodium to your water. The tradeoff: they don’t reduce hardness on a water test, they don’t make soap lather better, and they don’t remove iron. TAC works for scale prevention. It doesn’t work if you want the full benefits of soft water.
Annual cost: $60 to $150 for salt (40-lb bags, roughly one per month for a typical household). Resin lasts 7 to 15 years before replacement ($100-$300). Total annual operating cost: $100 to $300.
UV disinfection
What it removes: Bacteria, viruses, protozoa, and other microorganisms.
How it works: Water passes through a chamber with an ultraviolet light that destroys the DNA of microorganisms, rendering them unable to reproduce. The water is not chemically altered — no taste change, no chemical residuals.
When you need it: If your water has tested positive for coliform bacteria (even once), if you have surface water influence (shallow well, well near a stream), or if your well cap or casing has been compromised. UV provides continuous protection against biological contamination.
Pre-treatment is non-negotiable. UV light can only disinfect what it can reach. If your water has iron above 0.3 mg/L, manganese above 0.05 mg/L, hardness above 7 gpg, or turbidity above 1 NTU, the UV system will underperform. Those contaminants either absorb UV light or create shadows that let organisms pass through untreated. The pre-filtration must reduce these parameters before the UV chamber, or you’re getting a false sense of security.
NSF 55 Class A vs. Class B. Class A systems are designed to disinfect microbiologically unsafe water (40 mJ/cm2 dose). Class B systems are designed for supplemental treatment of already-disinfected water (16 mJ/cm2 dose). For a private well, you want Class A. The price difference is minimal, and the protection difference is significant.
Annual cost: $80 to $150 for UV lamp replacement (annual). $20 to $40 for quartz sleeve cleaning or replacement. Total: roughly $100 to $190 per year.
Reverse osmosis (RO)
What it removes: Almost everything — dissolved minerals, heavy metals (arsenic, lead, chromium), nitrates, fluoride, PFAS, bacteria, viruses, and most chemical contaminants. RO rejects 90-99% of dissolved solids.
How it works: Water is forced through a semi-permeable membrane with pores small enough to block nearly all dissolved substances. Water molecules pass through. Contaminants don’t.
Point-of-use vs. whole-house. Most residential RO systems are point-of-use — installed under the kitchen sink to treat drinking and cooking water only. Whole-house RO exists but is expensive ($3,000 to $10,000+), wastes significant water (2-4 gallons of waste per gallon of treated water), and requires pre-treatment to protect the membrane.
For most well owners, point-of-use RO makes sense when your water has a contaminant that other technologies can’t address effectively at the whole-house level — arsenic above 10 ppb, nitrates above 10 mg/L, lead, or PFAS (see the PFAS filtration section below for specifics on the new EPA standards). You treat the whole house for the cosmetic stuff (iron, hardness, sediment) and put RO under the kitchen sink for the health stuff.
Annual cost: $50 to $100 for membrane and pre-filter replacements. Point-of-use RO systems cost $150 to $400 to buy, plus $50 to $100 annually in filters.
Acid neutralizers
What they fix: Low pH (acidic water, below 6.5).
How they work: A tank filled with calcite (crushed marble, calcium carbonate) or a blend of calcite and Corosex (magnesium oxide). Acidic water dissolves the media, which raises the pH. The dissolved calcium and magnesium become part of your water — meaning an acid neutralizer will increase your hardness. If you already have hard water, you may need a softener after the neutralizer.
Why pH correction comes first. Acidic water corrodes copper pipes, causes blue-green stains, and creates pinhole leaks. But it also makes nearly every other treatment system work poorly. Iron filters need pH above 6.8-7.0. Softeners lose efficiency below 6.5. UV systems can’t compensate for the turbidity that acidic corrosion creates. Fix the pH first, then treat everything else.
Annual cost: $50 to $100 for calcite media refills (the media dissolves, so you add more periodically). The tank and valve last 10-15 years.
Chemical injection (chlorine or hydrogen peroxide)
When you need it: For iron or hydrogen sulfide levels that overwhelm passive oxidation systems (iron above 15 mg/L, H2S above 5 mg/L), or for iron bacteria that colonize well systems and create biofilm. Chemical injection is the heavy artillery.
How it works: A metering pump injects a precise dose of chlorine (sodium hypochlorite) or hydrogen peroxide into the water line upstream of a retention tank and carbon filter. The chemical oxidizes iron, manganese, and H2S aggressively. The retention tank provides contact time. The carbon filter removes the residual chemical before the water reaches your faucets.
Chlorine vs. hydrogen peroxide. Chlorine is cheaper and easier to source. Hydrogen peroxide doesn’t leave a taste or smell, breaks down into water and oxygen, and is more effective at high iron and H2S concentrations. Hydrogen peroxide is also better for septic systems since it adds oxygen rather than chlorine to the wastewater.
Annual cost: $100 to $300 for chemical supply, plus $50 to $100 for carbon filter replacement. More maintenance than passive systems — you’re managing a chemical feed pump and solution tank.
Building your treatment train
Most wells need more than one treatment stage. The concept of a “treatment train” means arranging multiple systems in the correct order so each stage does its job without interfering with the next.
The correct order, from well to house:
- Acid neutralizer (if pH below 6.5) — raises pH so downstream systems work properly
- Sediment filter (if turbidity or particles present) — protects everything downstream
- Oxidation + filtration (if iron, manganese, or H2S present) — removes metals before they reach the softener
- Water softener (if hardness above 7 gpg) — after iron removal, because iron fouls softener resin
- UV disinfection (if bacteria risk) — after all particulate removal, because UV needs clear water
- Point-of-use RO (if arsenic, nitrates, lead, or PFAS) — at the kitchen sink for drinking water
You may not need all six stages. A well with moderate iron, no hardness problems, and no bacteria risk might only need stage 3. A well with hard water and bacteria but no iron might need stages 4 and 5. Your water test dictates the configuration.
What NOT to do: Don’t install a softener before an iron filter if you have iron above 3 mg/L. The iron will destroy the softener resin within a year or two. Don’t install UV before sediment filtration. Don’t skip the acid neutralizer and wonder why your iron filter isn’t working.

Sizing your system
An undersized system chokes your water pressure. An oversized system wastes money. Getting the size right depends on two numbers: your home’s peak flow rate and your pipe diameter.
Peak flow rate. This is the maximum gallons per minute (GPM) your household demands when multiple fixtures run simultaneously. A rough estimate:
| Fixtures running | Approximate GPM |
|---|---|
| One shower | 2.0-2.5 |
| Kitchen faucet | 1.5-2.0 |
| Dishwasher | 1.5-2.0 |
| Washing machine | 2.0-3.0 |
| Two showers + kitchen | 6.0-7.0 |
If your household regularly runs two showers and a faucet at the same time, your treatment system needs to handle at least 7 GPM without significant pressure drop. Most whole-house systems are rated for 7 to 12 GPM depending on tank size. Check the manufacturer’s flow rating and make sure it exceeds your peak demand.
Pipe diameter. Most residential well systems use 1-inch pipe from the pressure tank. Treatment systems should use 1-inch ports to match. A system with 3/4-inch ports on a 1-inch plumbing system creates a bottleneck that cuts your pressure even when the filter media is clean.
The pressure drop test. After installation, check your water pressure at the farthest fixture with the system running. If you’ve lost more than 5 PSI compared to before installation, something is wrong — either the system is undersized, a filter is already partially clogged, or the plumbing connections are restricting flow. Five PSI or less of drop is normal and acceptable. The hardware guide covers how your pump and pressure tank factor into available pressure.
What maintenance actually costs
Treatment companies love to quote the purchase price. They’re less enthusiastic about the annual operating cost. Here’s the real maintenance picture.
| System | Annual cost | What you’re paying for |
|---|---|---|
| Sediment filter | $30-$100 | Cartridge replacements (every 1-3 months) |
| Air injection iron filter | $0-$50 | Electricity for backwash valve only |
| Greensand iron filter | $100-$200 | Potassium permanganate chemical |
| Water softener | $100-$300 | Salt ($60-$150/year) + occasional resin cleaning |
| UV disinfection | $100-$190 | Annual lamp + quartz sleeve |
| Acid neutralizer | $50-$100 | Calcite media refills |
| Point-of-use RO | $50-$100 | Membrane and pre-filter replacements |
| Chemical injection | $150-$400 | Chemical supply + carbon filter replacement |
A typical three-stage system (sediment + iron filter + softener) runs $200 to $450 per year in maintenance. That’s real money, and it’s recurring. Factor it into your decision.
Media replacement. Iron filter media (Birm, greensand, catalytic carbon) lasts 5 to 10 years depending on water conditions and backwash frequency. Softener resin lasts 7 to 15 years. These aren’t annual costs, but they’re not optional either. Budget $200 to $500 every 5-10 years for media replacement on each tank.
The maintenance you’ll skip (and what happens when you do). Sediment filters are the most commonly neglected component. A homeowner installs a whole-house system, changes the sediment filter twice, then forgets about it for a year. The filter clogs, pressure drops, and the homeowner blames the system. Set a reminder. Change the filter. It takes 5 minutes.
The contaminant-to-treatment cheat sheet
This is the reference table you’ll come back to. Match your water test results to the right treatment.
| Contaminant | Level | Treatment | Notes |
|---|---|---|---|
| Iron (dissolved) | 0.3-3 mg/L | Softener or air injection | Softener handles low iron as a bonus |
| Iron (dissolved) | 3-10 mg/L | Air injection or greensand filter | Don’t put this through a softener |
| Iron (dissolved) | 10+ mg/L | Chemical injection + filtration | Passive systems can’t keep up |
| Manganese | 0.05-0.5 mg/L | Air injection or greensand | pH must be above 7.5 for effective oxidation |
| Manganese | 0.5+ mg/L | Greensand or chemical injection | Air injection alone usually won’t cut it |
| Hardness | 7+ gpg | Water softener (ion exchange) | Or TAC for scale prevention only |
| pH below 6.5 | — | Acid neutralizer (calcite/Corosex) | Install before all other treatment |
| Hydrogen sulfide | Trace-3 mg/L | Air injection or catalytic carbon | Check if smell is hot-water-only first (anode rod) |
| Hydrogen sulfide | 3+ mg/L | Chemical injection | Air injection may not be enough |
| Coliform bacteria | Any detection | UV disinfection (Class A) | Fix contamination source first; UV provides ongoing protection |
| Nitrates | 10+ mg/L | Point-of-use reverse osmosis | Whole-house RO is impractical for most homes |
| Arsenic | 10+ ppb | Point-of-use reverse osmosis | Test for arsenic III vs V; III may need pre-oxidation |
| Tannins | Any detection | Tannin-selective anion resin | Not an iron filter — completely different technology |
| Sediment | Visible | Sediment filter (5-20 micron) | Also required as pre-treatment for most systems |
Notice how many entries in the “Notes” column reference other systems. That’s the treatment train concept in action. Contaminants interact with each other and with treatment technologies. A water test gives you the full picture so you build the right system the first time.
Best filters by contaminant type
The cheat sheet above gives you the technology. This section gives you the specific approach for the most common well water problems, because the right system depends entirely on what your water test found.
Iron bacteria filters
Iron bacteria are a different beast from dissolved iron. These microorganisms feed on iron in your water and form a slimy, rust-colored biofilm inside pipes, toilet tanks, and well casings. You’ll know you have them because the slime is stringy or gelatinous — not just orange staining, but actual goop.
Standard iron filters won’t solve an iron bacteria problem. The bacteria colonize the filter media and keep growing. What works:
- Shock chlorination first, to kill the existing colony. This is a one-time treatment where you introduce a concentrated chlorine solution into your well and flush it through the system.
- Continuous chemical injection (chlorine or hydrogen peroxide) for ongoing control. The chemical kills bacteria before they can colonize downstream equipment.
- Follow-up filtration with catalytic carbon to remove the chemical residual before it reaches your faucets.
If your troubleshooting guide symptoms point to iron bacteria — slimy deposits, musty smell, or rust-colored goo in your toilet tank — don’t waste money on a standard iron filter. Go straight to chemical injection.
Sulfur and hydrogen sulfide (H2S) removal
That rotten egg smell is hydrogen sulfide gas dissolved in your water. But before you buy a treatment system, check one thing: does the smell come from all faucets, or only hot water?
Hot water only: The problem is probably your water heater’s magnesium anode rod reacting with sulfate-reducing bacteria. Replace the anode rod with an aluminum/zinc version ($20-$40 part, 30-minute job) and the smell often disappears. This fix costs nothing compared to a whole-house treatment system.
All faucets (hot and cold): The H2S is in your well water. Treatment depends on concentration:
- Low levels (trace to 3 mg/L): Air injection or catalytic carbon filter. These passive systems handle moderate sulfur without chemicals.
- High levels (3+ mg/L): Chemical injection with hydrogen peroxide is more effective than chlorine for H2S because it oxidizes the gas more aggressively. Follow with catalytic carbon filtration.
PFAS filtration
PFAS (per- and polyfluoroalkyl substances) are the “forever chemicals” that have been showing up in well water testing across the country. Unlike iron or hardness, you can’t see, smell, or taste PFAS. The only way to know if they’re in your water is to test specifically for them.
Why this matters for well owners: Municipal water systems are now required to test for and treat PFAS under the 2024 EPA drinking water standard. Private wells have no such requirement. Nobody is testing your water for PFAS unless you do it yourself. The EPA set maximum contaminant levels at 4 parts per trillion for PFOA and PFOS — extremely low concentrations that require sensitive lab testing to detect.
What removes PFAS:
- Reverse osmosis (point-of-use): The most effective residential option, rejecting 90-99% of PFAS compounds. Install under the kitchen sink for drinking and cooking water. Cost: $150-$400 for the system, $50-$100/year for filters.
- Granular activated carbon (GAC): Effective for longer-chain PFAS compounds (PFOA, PFOS) but less effective for shorter-chain varieties. A whole-house GAC system costs $1,000-$2,500 and requires regular carbon replacement.
- Ion exchange resins: Specialized anion exchange resins designed for PFAS removal are emerging as a whole-house option, but residential systems are still relatively new and expensive.
For most well owners, the practical approach is a point-of-use RO system under the kitchen sink for drinking water, combined with whatever whole-house treatment your other contaminants require. The annual maintenance checklist covers when and how to add PFAS to your testing schedule.
Manganese removal
Manganese doesn’t get the attention that iron does, but it’s actually more concerning at lower concentrations. The EPA’s health advisory for manganese — especially for infants and young children — kicks in at 0.3 mg/L. The secondary (aesthetic) standard is 0.05 mg/L. If your water test shows manganese above 0.05, you’ll see black staining that’s harder to remove than iron stains.
The catch with manganese: it requires a higher pH to oxidize than iron does. Air injection systems work for manganese only if your pH is above 7.5. Below that, you need greensand filtration (which uses potassium permanganate as the oxidizing agent) or chemical injection. Fix your pH first, then address the manganese.
Aquasana vs SpringWell vs Culligan: which system for your well?
Three brands come up constantly in well water filtration discussions. Here’s an honest comparison based on what each actually offers and where they fall short.
Aquasana makes well water systems in the $1,500-$3,000 range. Their whole-house well water system (the EQ-Well-UV) bundles a sediment pre-filter, salt-free conditioner (TAC, not a true softener), carbon filter, UV disinfection, and a sub-micron post-filter. Strengths: good all-in-one approach if your water has moderate contaminants, solid carbon filtration. Weaknesses: the salt-free conditioner won’t fix hard water symptoms (soap scum, dry skin, scale buildup) — it only prevents scale in pipes. If you have significant iron, the system doesn’t include oxidation filtration, which is a gap. And at the price point, you’re paying for the brand.
SpringWell focuses specifically on well water treatment. Their whole-house systems range from $1,500-$4,000+ depending on configuration. They sell iron/sulfur/manganese filters, softeners, and UV as separate components, which means you can build a treatment train that matches your actual water chemistry rather than buying a bundle that may not address your specific problems. Strengths: modular approach, strong iron filtration options, good customer support. Weaknesses: the a-la-carte pricing adds up fast, and you need to know what you’re buying to avoid over-speccing the system.
Culligan operates through local dealers, which means pricing and service quality vary by region. A Culligan system typically runs $2,000-$5,000+ installed, including the dealer markup and professional installation. Strengths: local service, professional installation, they’ll test your water and design a system for you. Weaknesses: you’re paying for that convenience — the same treatment technologies cost 30-50% less bought directly. And the “free water test” is a sales tool, not an independent analysis. Get your water tested by a certified lab first, then use those results to evaluate whatever Culligan (or anyone else) recommends.
The honest answer: None of these brands sells a magic box that solves every well water problem. The right choice depends on your water test results, not the brand name. A $1,800 SpringWell iron filter solves your problem if you have iron. A $3,000 Aquasana bundle doesn’t solve it if your iron is above the level their carbon filter can handle. Start with the water test, match contaminants to technologies, then shop for the system that delivers those specific technologies at a reasonable price.
Get your water tested. Read the results. Match the contaminants to the technologies above. Install in the correct order. Budget for the maintenance. That’s the whole playbook.
Your next step: Get your water tested if you haven’t already. Once you have results in hand, this guide tells you what you need. For the hardware side — how treatment systems connect to your existing pump and pressure tank setup — the hardware guide covers the plumbing. And for keeping everything running year after year, the annual maintenance checklist has the schedule.
Related guides

Buying a house with a private well: the inspection checklist
What to inspect, test, and negotiate before closing on a home with a private well. Flow rates, water quality, pump age, septic distances, and the contingency clause that protects you.
12 min read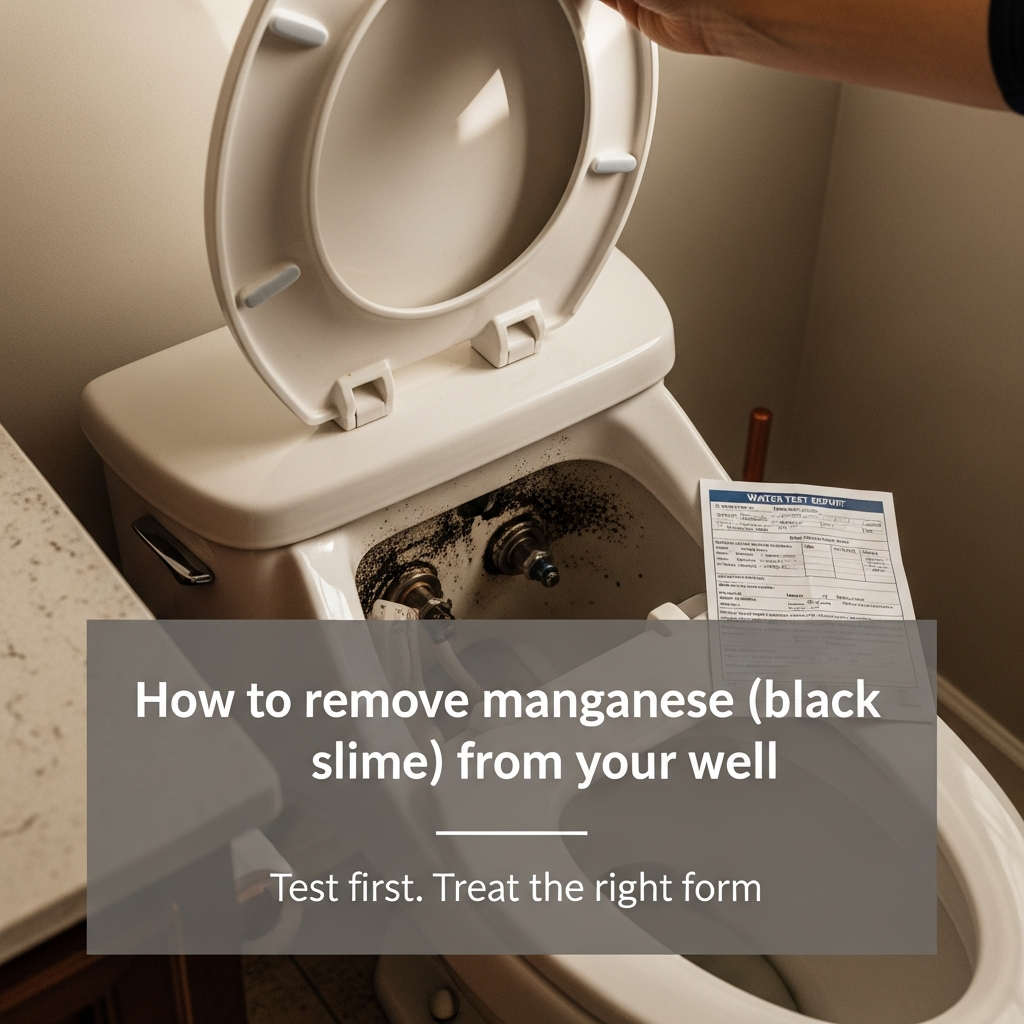
How to remove manganese (black slime) from your well
Black stains and black slime in well water usually point to manganese. Here's how to confirm it, when health guidance matters, and which treatment systems actually work.
10 min read
The beauty guide for well owners: hair, skin & laundry
Hardness, iron, manganese, and copper can wreck hair, irritate skin, and stain laundry. This guide shows how to tell which one is hitting your house and what actually fixes it.
12 min read